Digital signatures
Add or create a digital ID, sign a PDF or a signature field with it on iPhone and iPad, add a time stamp, lock a form after signing, and check the signatures of a signed document.
A digital signature is made with a digital ID: a certificate and its private key, kept on your device. It proves who signed and shows whether the document changed after signing. This is different from signing with your handwritten signature, which only places a picture of it.
Signing with a digital ID needs Pro. Checking the signatures of a document is free.
Your digital IDs
Open the Settings tab and tap Digital IDs (in Documents; it says how many are on this device). The list shows each digital ID with who issued it and until when it is valid. Under the list:
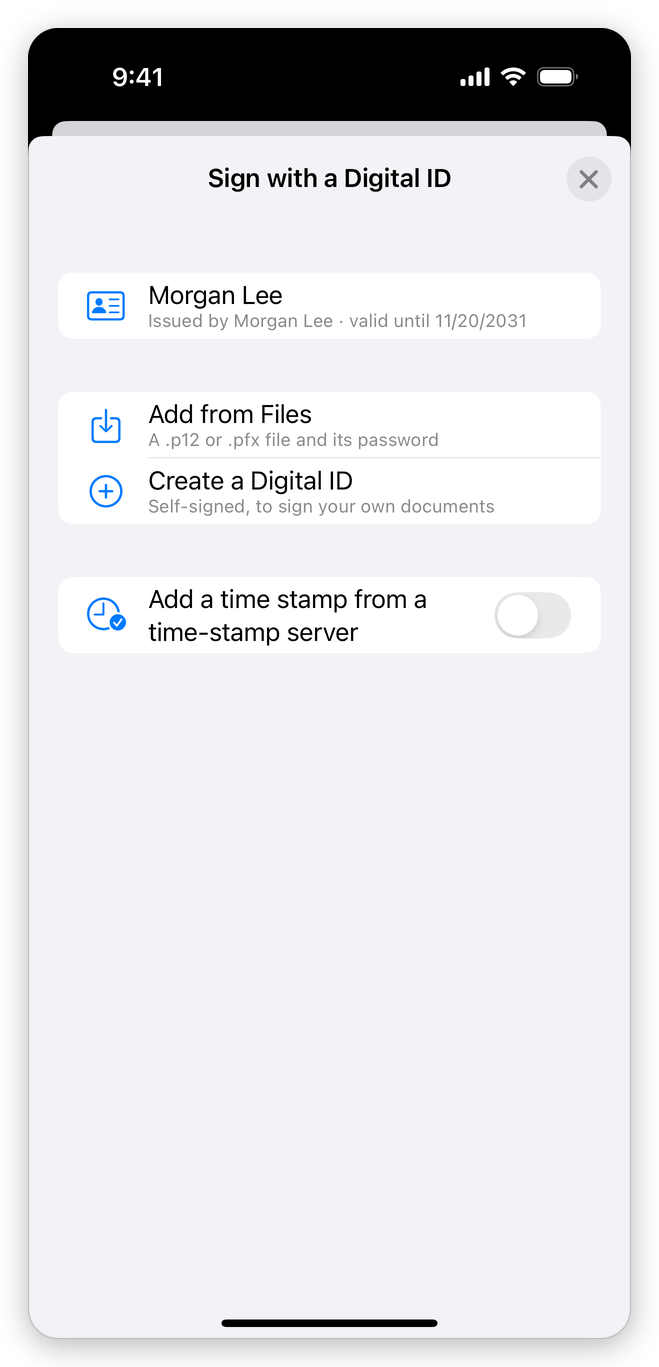
- Add from Files: a digital ID file (.p12 or .pfx) from the Files app. Choose the file, type its password and tap Done.
- Create a Digital ID: a self-signed digital ID made on the device. Type the name your signatures show, then a password to protect the ID, twice.
To remove a digital ID from the device, tap it in the list and tap Remove.
The digital IDs are kept in the device's keychain. Their passwords are not: the app asks for the password the first time you sign with an ID, and remembers it until the app closes.
A self-signed digital ID is fine for trying out signing, or between people who trust each other's certificates. For signatures that others must be able to check, get a digital ID from a certificate authority and add it from Files.
Sign with a digital ID
- Open the document and tap Fill & Sign at the bottom of the screen.
- Tap Sign with ID (on an iPhone, swipe the row of tools sideways to reach it).
- Tap your digital ID in Sign with a Digital ID. If you have none yet, add or create one there (see above).
- Type the ID's password and tap Done.
- The app says Tap the page where it goes. Tap the page: the signature box is placed there, centred where you tap.
The document is signed and saved at once, and the app says Signed. The signature box on the page shows your name and the date. An expired digital ID cannot sign: the app says when it expired.
A signed document can still be changed, but every change is added after the signature, and the list of signatures says so. Make all your changes before you sign.
Add a time stamp
A time stamp takes the signing time from a trusted server instead of your device's clock. In Sign with a Digital ID, turn on Add a time stamp from a time-stamp server. Time-stamp server then shows the server used: tap it to choose another in the list, or Other… to type the address of another. The app remembers your choice for the next signatures.
The app also stores in the signature what is needed to check it years from now (the certificate's revocation information), when it can be had. Your device must be online for both; without a connection, the document is still signed, without them.
Sign a signature field
When a form has a signature field, tap the field, then tap Sign with ID. Choose the digital ID and type its password as above; the signature goes into the field.
Some forms lock themselves when a field is signed. The app says so first (Signing this field locks the document: nothing can be changed after that.), and you tap Sign with ID to go on. Where the form leaves it to you, the app asks whether to lock the document after signing: Sign Only leaves it open to changes that the signature allows, Sign and Lock allows no more changes after your signature, and makes the form's fields read-only.
Check the signatures of a document
When a document has signatures, a label under the top bar says who signed and what the app found, for example Signed by Morgan Lee: valid. After a few seconds only its icon stays, to leave the page in view.
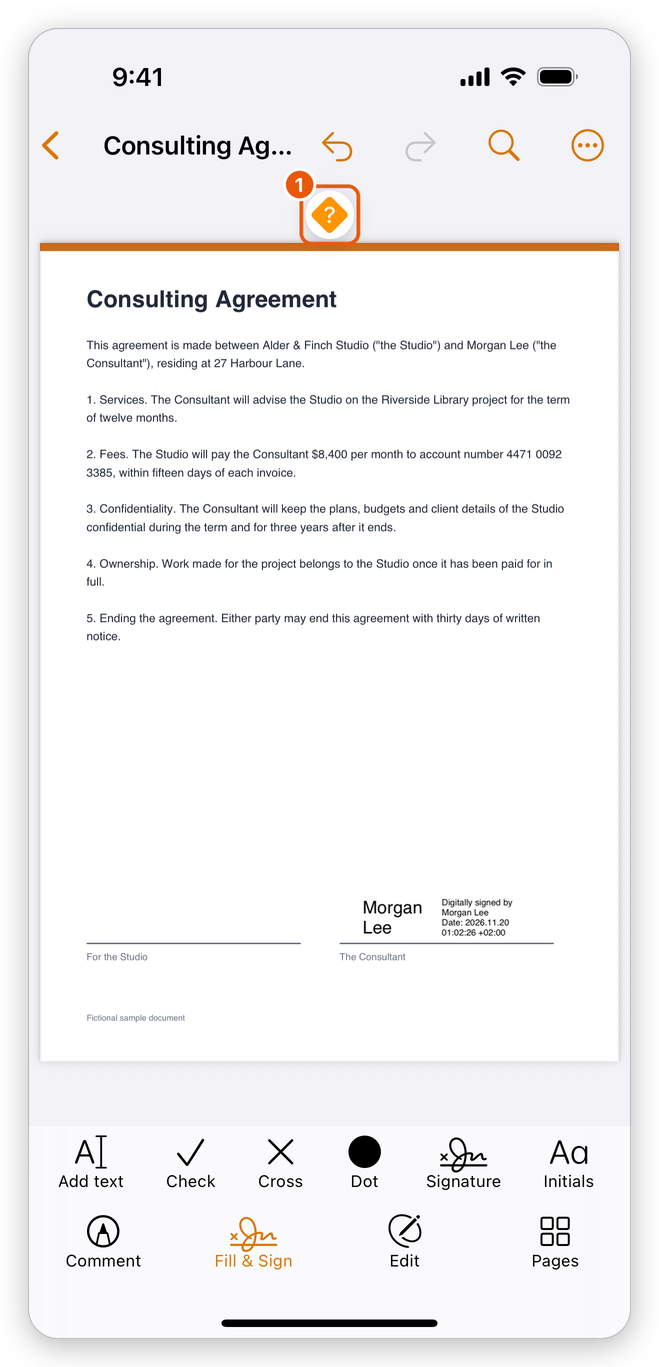
- The signature's label: tap it to see the signatures.
To see the signatures, tap the label, or tap More (the circle with three dots), then Protect & Redact > Signatures. Tapping a signed signature field shows them too.
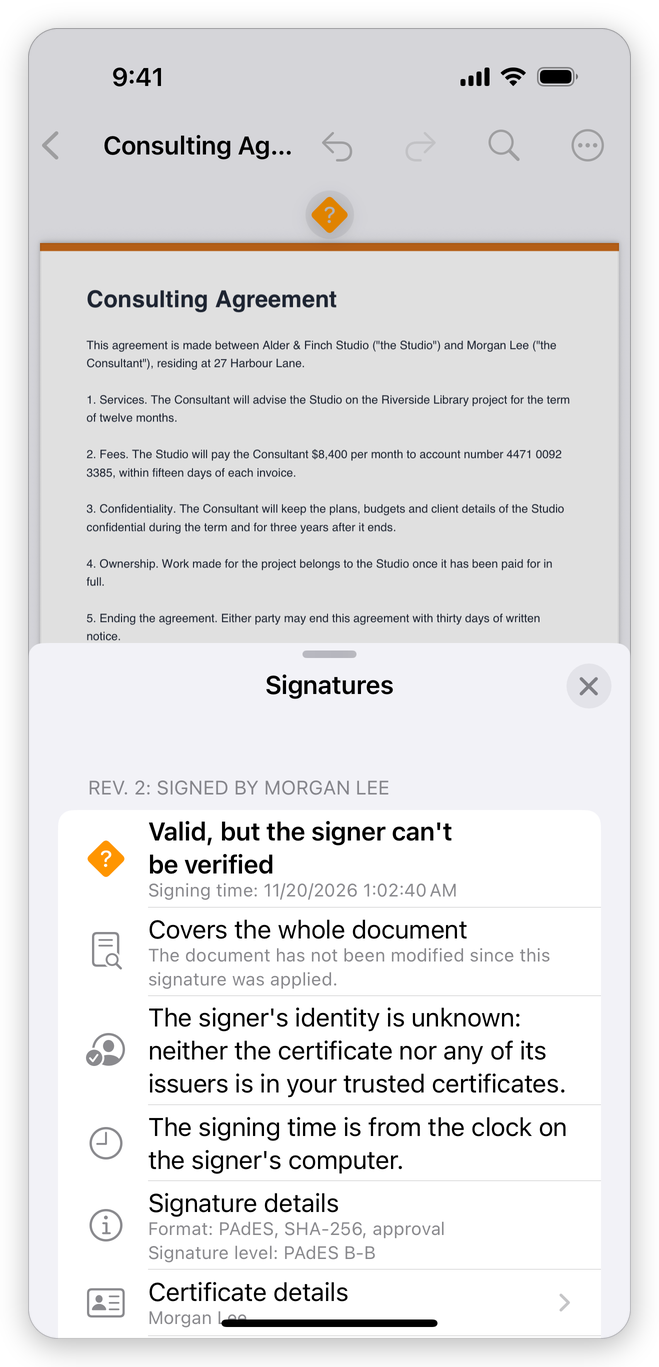
The list has a section for each signature, in the order they were made (Rev. 1, Rev. 2...). Each signature has one of these results:
| Result | What it means |
|---|---|
| Valid | The document has not changed since it was signed (or only in ways the signature allows), and the signer's identity is trusted. |
| Valid, but the signer can't be verified | The document has not been changed in ways the signature does not allow, but the signer's certificate, or the one that issued it, is not one that the app trusts. A signature made with a self-signed digital ID shows this. |
| Changed after signing | The document was altered after signing, or changed in ways the signature does not allow. |
| Invalid | The signature itself does not hold, or the certificate is not valid (for example, it was revoked). |
Under the result, the list says when it was signed, whether the signature covers the whole document or one revision of it, whether the signer's identity is valid, and whether the signing time came from a time-stamp server or from the signer's device. Signature details shows the reason, the place and the format. Tap the certificate's row to see the signer's certificate and the ones that issued it, and the field's row to go to its page. When the document was changed after it was signed, the list says how many changes there were, and what they were.
Clear Signature takes a signature out of its field, so that the field can be signed again; Clear All Signature Fields does it for every signature. Undo brings them back.
Which signers are trusted
The app trusts the major document signing providers and the EU Trusted Lists at first (it downloads their small lists). Turn them on or off in Settings, under Trusted certificates: Also trust the EU Trusted Lists and Also trust major document signing providers (DigiCert, GlobalSign and others). See Settings.
Related pages
- Sign a PDF: signing with a picture of your signature.
- Certificate security: encrypting a document for the holders of certain certificates.
- Fill in forms: the other tools of Fill & Sign.