Sign a PDF
Add your signature or initials to a PDF on iPhone and iPad by drawing them with a finger or the Apple Pencil, typing your name or using a photo of your signature, then place, move, resize and recolour them.
Sign a letter, a contract or a form with your own signature: drawn with your finger or the Apple Pencil, typed in a handwriting style, or taken from a photo of your signature on paper. Signing this way is free.
This signature is a picture of your signature, placed on the page. It shows who signed, but it does not protect the document: anyone could copy it, and the document can still be changed after it. When the signature must prove who signed and that nothing changed since, sign with a digital ID instead. See Digital signatures.
Create your signature
- Tap Fill & Sign at the bottom of the screen, then Signature.
- Make your signature in one of three ways:
- Draw: draw it in the white box with your finger or the Apple Pencil.
- Type: type your name (it starts as the Author Name set in Settings, if you set one). Tap the signature under it to try the next handwriting style.
- Photo: tap Choose a Photo and pick a photo of your signature on white paper. The paper is taken away, so only the ink shows.
- Tap Done. Clear starts again; Cancel gives up.
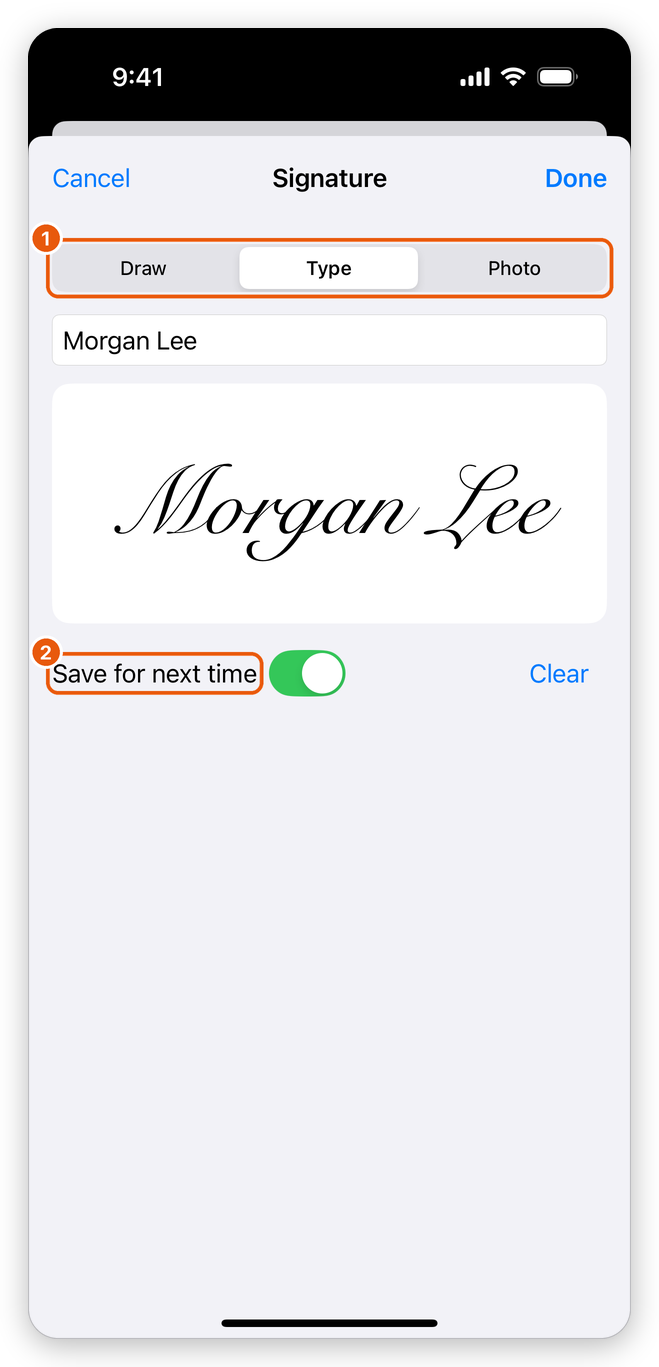
- Draw, Type or Photo: how you make the signature.
- With Save for next time on, the app keeps your signature on this device, so you make it only once.
Place your signature
After Done, the app says Tap the page where it goes. Tap the page: the signature is placed there, centred where you tap.
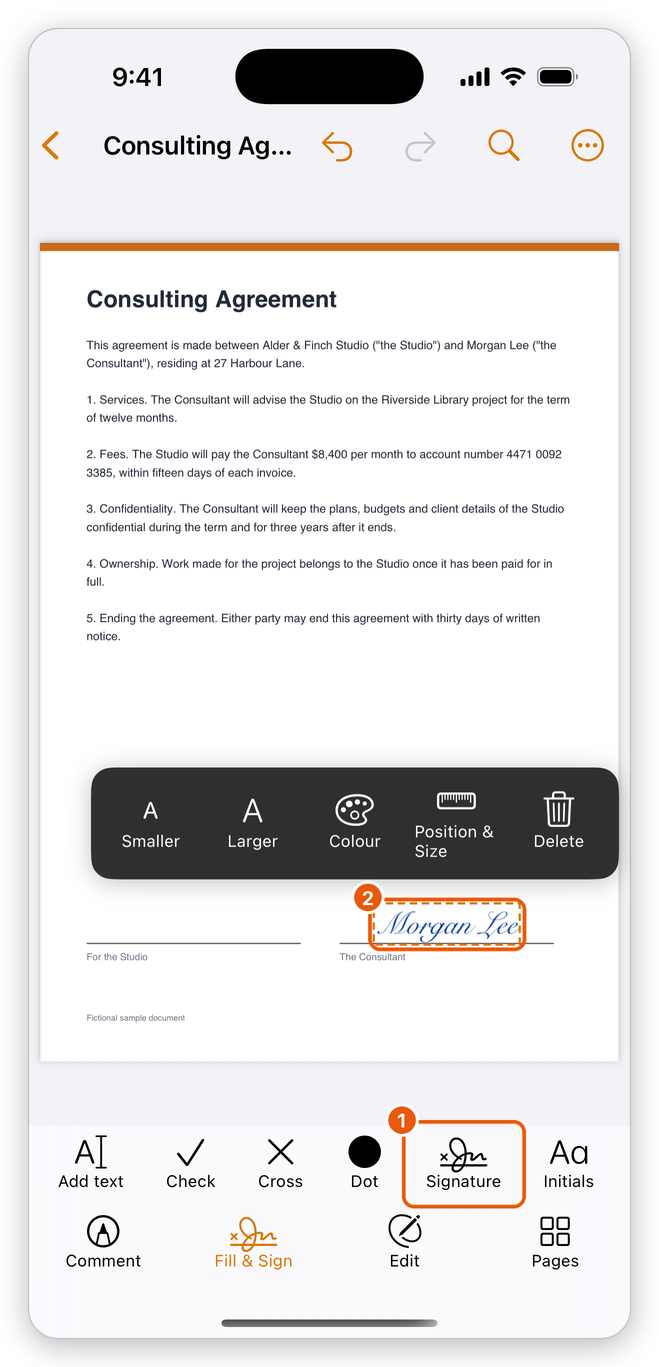
- Signature: tap it again to place your saved signature on another page or document.
- The signature, selected, with its bar.
The signature is selected after you place it. Tap it later in Fill & Sign to select it again. Then:
- Move it: drag it to the line.
- Resize it: tap Smaller or Larger.
- Change its colour: tap Colour and choose the ink: black, dark blue, blue, red, green or purple.
- Place it exactly: tap Position & Size.
- Remove it: tap Delete.
The ink chosen with Colour in the row of tools is the one of what you place next, and of the text, ticks and crosses of Fill & Sign too.
The app saves the document on its own, a moment after the signature is placed. See Save a PDF.
Use your saved signature
Once your signature is saved, tapping Signature asks whether to use it: tap Use Saved, then tap the page. Make New opens the sheet to make another; with Save for next time on, it takes the place of the saved one.
Add your initials
Some documents ask for your initials on every page. In Fill & Sign, tap Initials and make them as you made your signature (Type starts with the initials of your Author Name, if you set one). Then tap the page where they go. For each next page, tap Initials, then Use Saved, then the page.
Sign in a signature field
Some forms have a signature field, a box made for the signature. Tap it: the app asks whether to sign it with a drawn signature or with a digital ID.
- Draw a Signature places your saved signature inside the field, sized to fit it. If you have no saved signature yet, the app asks you to make one first.
- Sign with ID signs the field with a digital ID instead, which needs Pro: see Digital signatures.
Tap a field you have already drawn your signature in to select that signature, to move, resize, recolour or delete it.
Signing with your signature or initials is free. Sign with ID needs Pro.
Related pages
- Fill in forms: the other tools of Fill & Sign.
- Digital signatures: signing with a digital ID, and checking signatures.
- Use the Apple Pencil: drawing with the Pencil.