Comment on a PDF
Highlight, underline and strike out text, mark insertions and replacements, add notes, text boxes and callouts, and change how a comment looks in the Properties panel.
Comments sit on top of the page: they never change the document's own text, and anyone with a PDF reader can see them. Click the Comment tab to see the tools. The Comments panel opens on the right with every comment in the document.
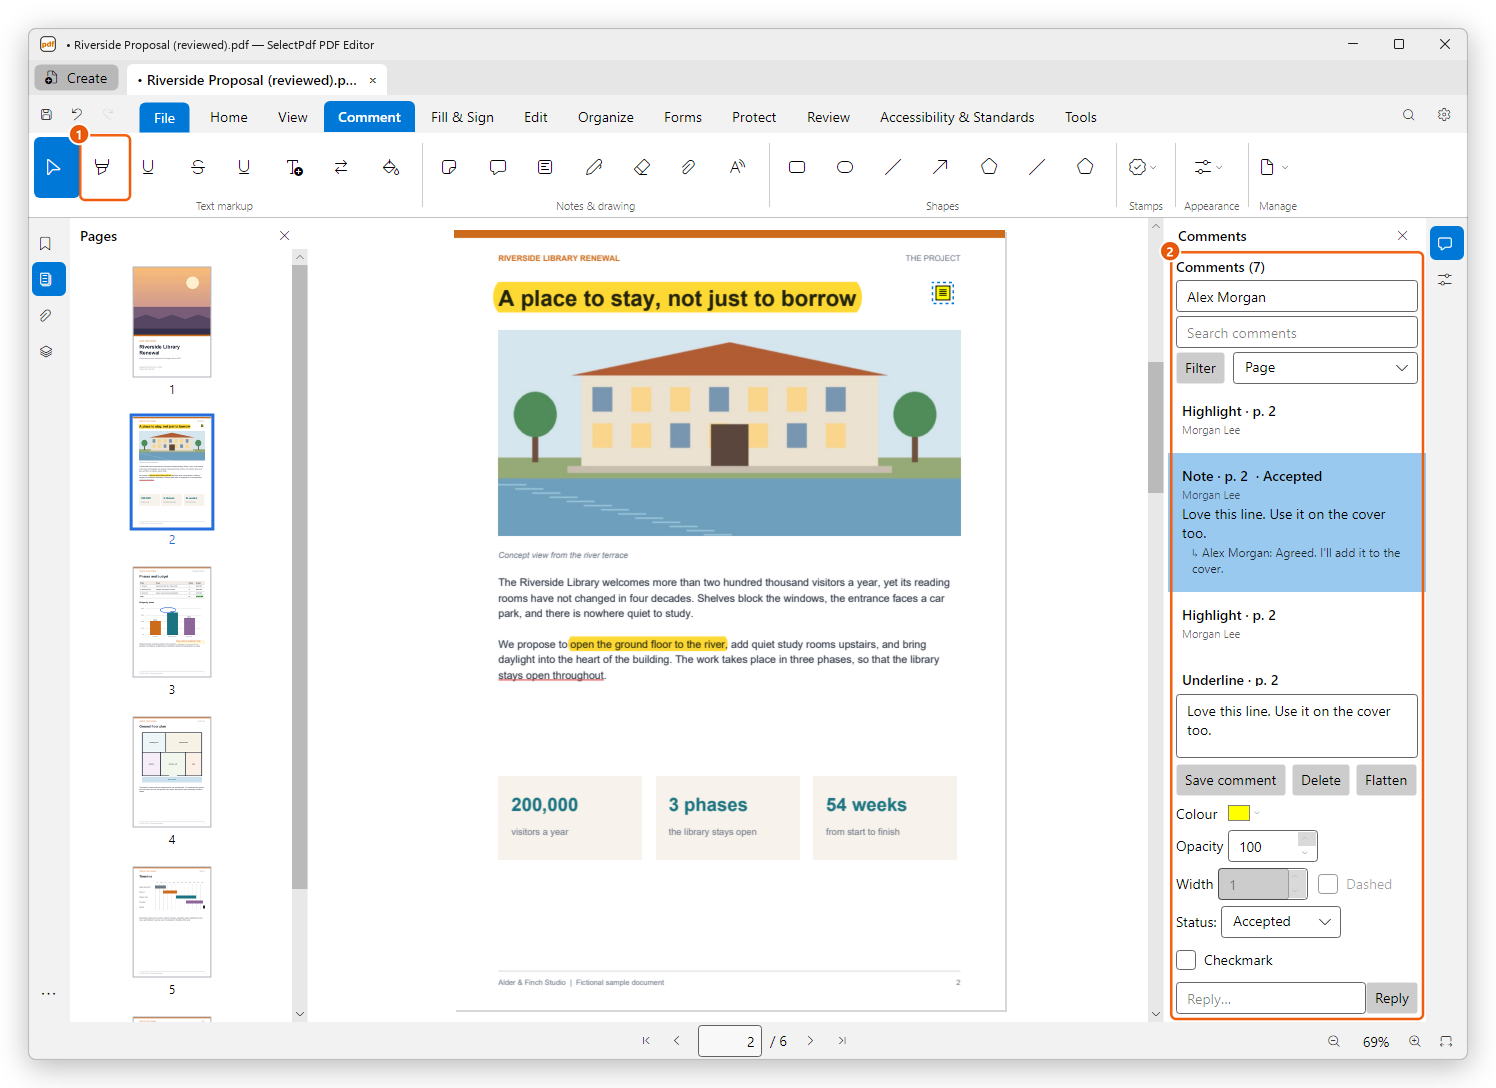
- Highlight, one of the comment tools of the Comment tab.
- The Comments panel: the document's comments, with their replies and status. See Manage comments.
This page covers marking up text, notes, text boxes and callouts, and how a comment looks. The other comment tools have pages of their own: drawings and shapes, stamps and measurements. To check the spelling of your comments, see Check spelling.
The comment tools
The Comment tab groups its tools by what they make. The buttons show only their icons: point at a button to see its name. In a narrower window, the Stamps, Appearance and Manage groups fold into one button each: click it to open the group.

- Text markup: Select, Highlight, Underline, Strike, Squiggly, Insert text, Replace text and Highlight area.
- Notes & drawing: Note, Callout, Text box, Pen, Eraser, Attach file and Record audio.
- Shapes: Rectangle, Ellipse, Line, Arrow, Polygon, Polyline and Cloud.
- Stamps: Stamp, Dynamic stamp and the list of stamps.
- Appearance: the colour, the fill and the line width of what you add next.
- Manage: Summarize comments, Export comments, Import comments and Flatten all.
A tool stays on until you choose another one or press Esc, which goes back to Select. A few tools are done after one use and go back to Select by themselves: Dynamic stamp, Attach file and Record audio.
The most used tools are on the Home tab too, in its Comment & sign group: Highlight and Note.
Highlight, underline or strike out text
There are two ways to mark up text.
With the tool:
- On the Comment tab, click Highlight, Underline, Strike or Squiggly.
- Drag over the text. The mark is added when you release the mouse button.
- Drag over more text to mark it the same way, or press Esc when you are done.
From a selection: select the text first with Select, then click Highlight, Underline, Strike or Squiggly on the ribbon. The selected text is marked, and Select stays on.
When you select text, a small toolbar also appears next to the selection. It has Highlight, Underline and Strike, the Markup colour of the next mark, and Copy, which copies the selected text. The toolbar closes once you use it, or when you click elsewhere.
The mark takes the colour chosen in the Appearance group (yellow at first). To change it afterwards, see A comment's appearance.
To mark a picture, a chart or a table rather than text, click Highlight area and drag a box around it.
Mark insertions and replacements
When you correct a text, mark what should change the way an editor does on paper:
- Insert text marks the place where words are missing. Click between the two letters where the words go, type them in the Insert Text box and click OK. A caret (^) marks the place on the page.
- Replace text strikes out words and gives the words that replace them. Select the text first, click Replace text, type the new words after Replace with: and click OK. The old words are struck through and a caret after them carries the new ones.
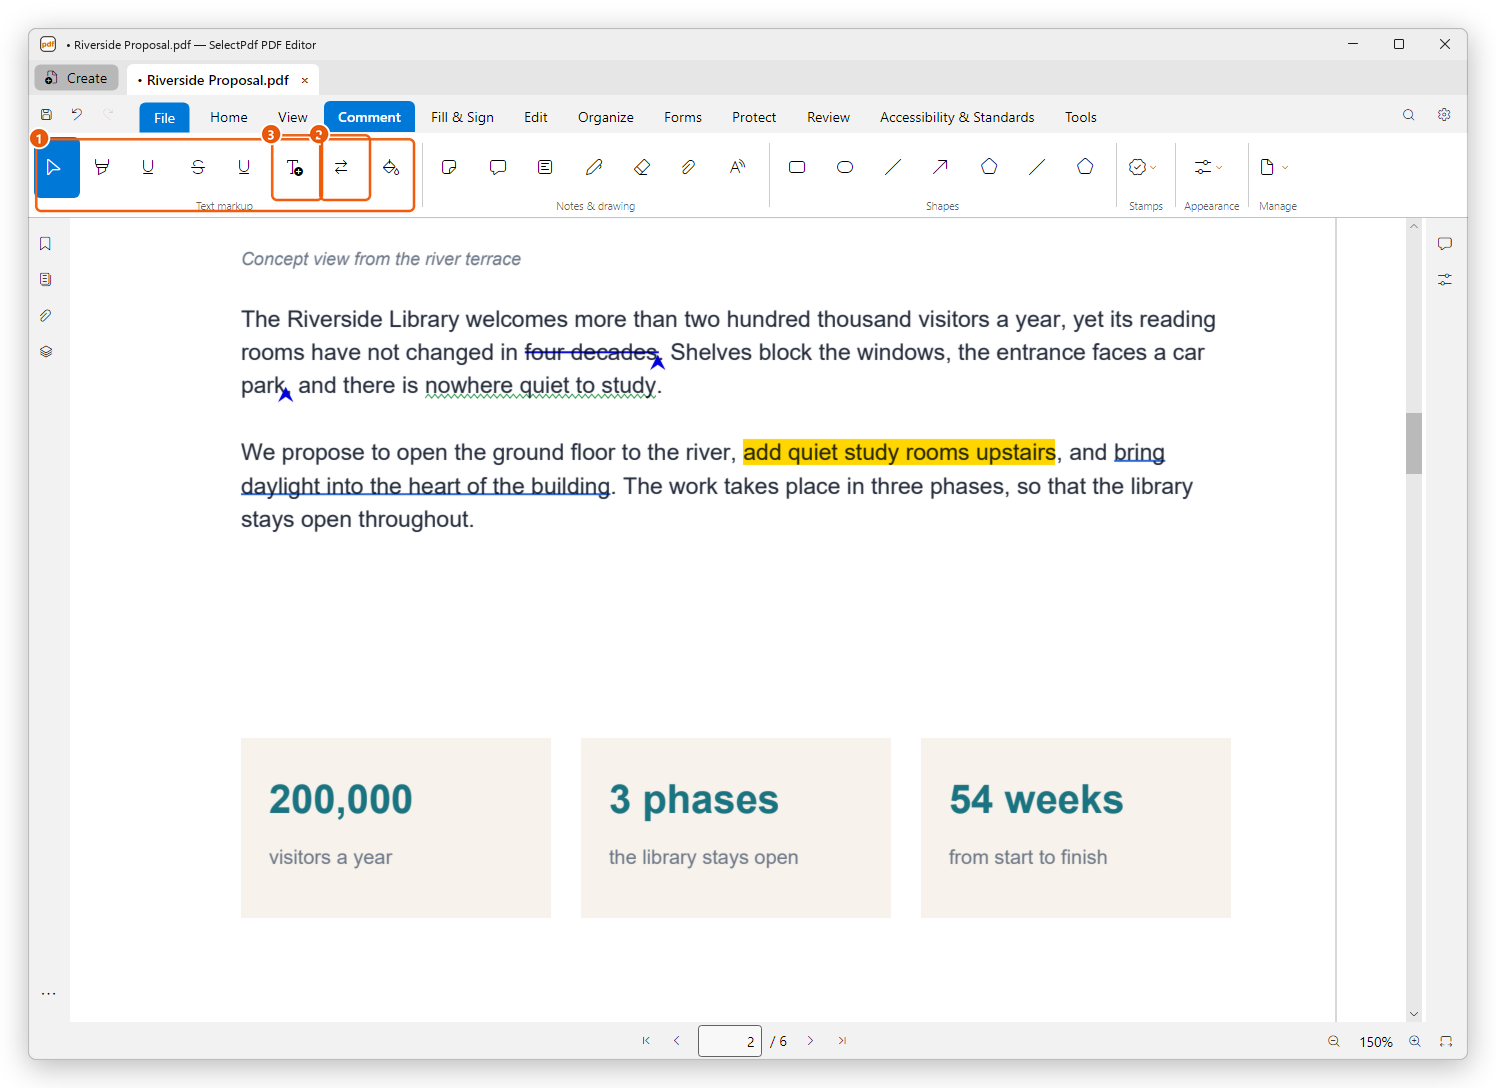
- The Text markup group: from left to right Select, Highlight, Underline, Strike, Squiggly, Insert text, Replace text and Highlight area. On the page: a highlight, an underline, a squiggly underline, a replacement and an insertion.
- Replace text: "four decades" is struck out, and "forty years" is given in its place.
- Insert text: the caret after "car park" carries the words to insert.
The words of an insertion or a replacement are the comment's text: they show in the Comments panel, where the comment is listed as Insert text or Replace text, and in a tip when you point at the caret.
In the text boxes of the editor's dialogs, Enter starts a new line and Ctrl+Enter clicks OK.
Add a note
- Click Note.
- Click the page where the note goes.
- Type your comment and click OK (or press Ctrl+Enter).
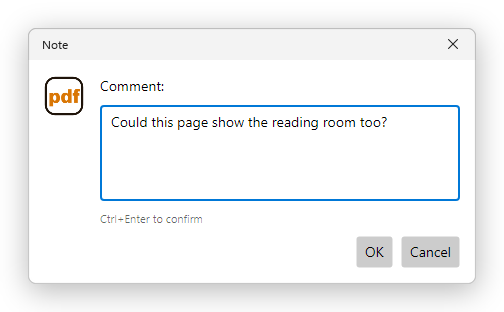
The note shows as a small icon on the page, and its text in the Comments panel. Point at the icon to read the text in a tip. You can choose another icon for it in the Properties panel (see below).
Add a text box or a callout
Unlike a note, a text box shows its text on the page itself.
A text box:
- Click Text box.
- Drag a box on the page where the text goes. (A click without dragging makes a box of a standard size.)
- Type the text and click OK.
A callout is a text box with a line that points at something on the page:
- Click Callout.
- Press the mouse button where the arrow should point, and drag to where the text goes.
- Release the button, type the text and click OK.
The text box starts where you released the button, to the right of that point (or to its left when you dragged to the left). A click without dragging puts the text up and to the right of the point.
A new text box or callout has its text in black, 12 points, with a thin border in the tool colour. To change its font, size, colour or alignment, select it and open the Properties panel.
Change a comment's text
Double-click a comment on the page (or select it and press Enter). Its text opens in a box under it: change it and click Save (Ctrl+Enter), or Cancel (Esc).
You can also change it in the Comments panel: select the comment, edit its text in the box at the bottom and click Save comment.
A comment's appearance and properties
Before you add a comment, choose its look in the Appearance group of the Comment tab: the colour, the fill (for shapes, text boxes and callouts; it can be none) and the line width (1, 2, 3, 5 or 8 points). These apply to every comment you add next, until you change them.
After you add it, select the comment with Select, then:
- pick a colour or a fill in the Appearance group: it changes the selected comment too; or
- open the Properties panel: click the Properties icon on the right side of the window. The panel shows every setting of the selected comment, and a change applies at once.
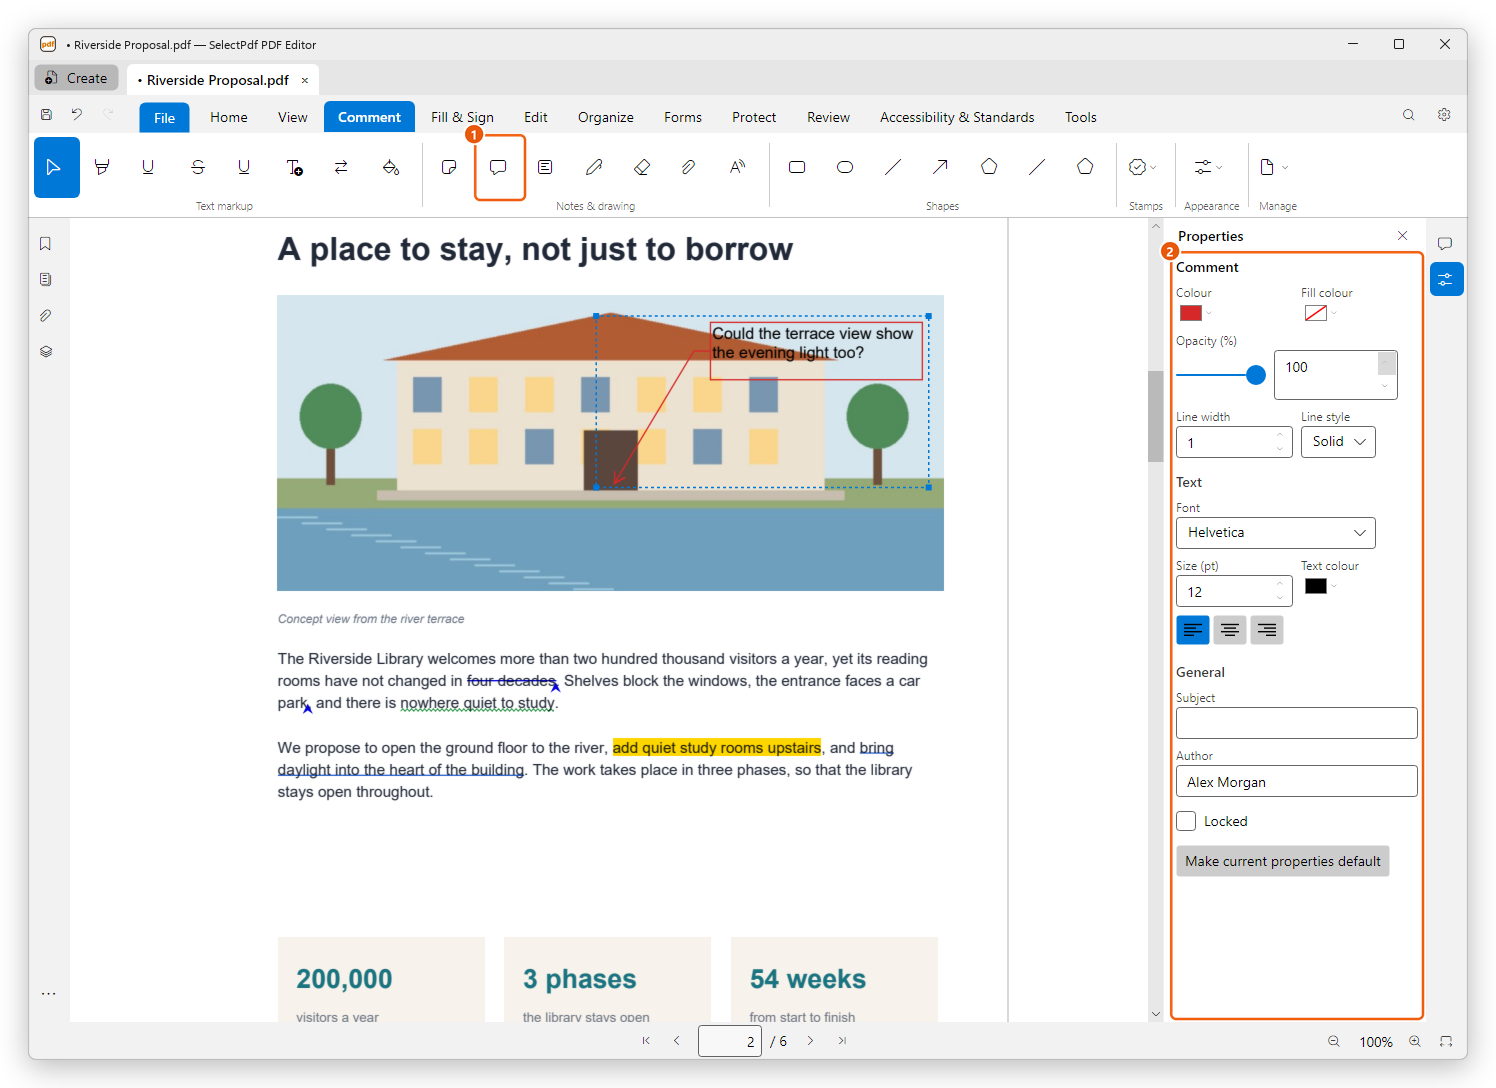
- Callout on the Comment tab.
- The Properties panel of the selected callout: its colours, opacity and border, its text and the General settings.
The Properties panel has, depending on the kind of comment:
- Colour: the comment's colour: a highlight's or a note's colour, a shape's or a line's line, a text box's or a callout's border. Fill colour is the inside of a shape or of a text box, or of a line's closed arrow heads; No colour leaves it empty.
- Opacity: from 0 (invisible) to 100 percent (solid). Use the slider or type a value.
- Line width and Line style: Solid, Dashed, Dotted, Dash dot or Long dash; for shapes, text boxes and callouts also Cloudy and Cloudy (large).
- Start and End: the ends of a line or a polyline (arrows, a circle, a square, a slash...). See Drawings and shapes.
- Icon: the icon of a note (Comment at first): Note, Comment, Help, Insert, Key, New paragraph, Paragraph, Check, Circle, Cross or Star.
- Text, for a text box or a callout: the Font, the Size (pt), the Text colour, and the alignment buttons (Align left, Center, Align right).
- General: the Subject and the Author of the comment, and Locked. A locked comment cannot be moved, resized or deleted, and its other properties cannot be changed until you clear Locked again; you can still change its text, reply to it and set its status. Other PDF readers that honour the setting do the same.
Make current properties default makes the selected comment's colour, fill, opacity and line width the starting look of the comments you add next.
The Comments panel has the most used of these settings too, under the selected comment: Colour, Fill, Opacity, Width and Dashed, depending on the kind of comment.
The colour buttons open a palette with the recent colours. Other colour opens the colour dialog, for any colour.
Move, resize or delete a comment
Click a comment on the page, or in the Comments panel, to select it. A dashed frame shows around it.
- Move it: drag it.
- Resize it: drag a corner handle (shapes, text boxes, drawings, lines and stamps have them; a note keeps the size of its icon, and a text markup the size of its text).
- Delete it: press Delete, or click Delete in the Comments panel. Its replies go with it.
A comment marked Locked in the Properties panel has no corner handles, stays where it is when you drag it, and is not deleted; clear Locked first.
Undo (Ctrl+Z) takes back any change, one step at a time.
Your name on your comments
Each comment carries the name of its author. Yours is the name in the box at the top of the Comments panel (Your name), the same as Name in Preferences > Identity. Type your name there before you start. See Manage comments.
All the comment tools are free: text markup, notes, text boxes, callouts, drawings, shapes, stamps, attachments and sound comments, replies and status, and flattening. Exporting and importing comments and measuring need Pro.
Save the document (Ctrl+S) to keep your comments in the PDF.