Organize pages
Rotate, delete, move, insert, extract, split and crop the pages of a PDF in the Organize view, one page or many at a time.
The Organize view shows all the pages of the document side by side, so you can put them in order and change them. Organizing pages is free.
Open the Organize view
Click the Organize tab, or click Organize pages on the Home tab. The pages show as large thumbnails, and the Organize tab has the tools. Under each page is its number or, in a document with page labels, its label with the page number in brackets when the two differ, such as iii (3).
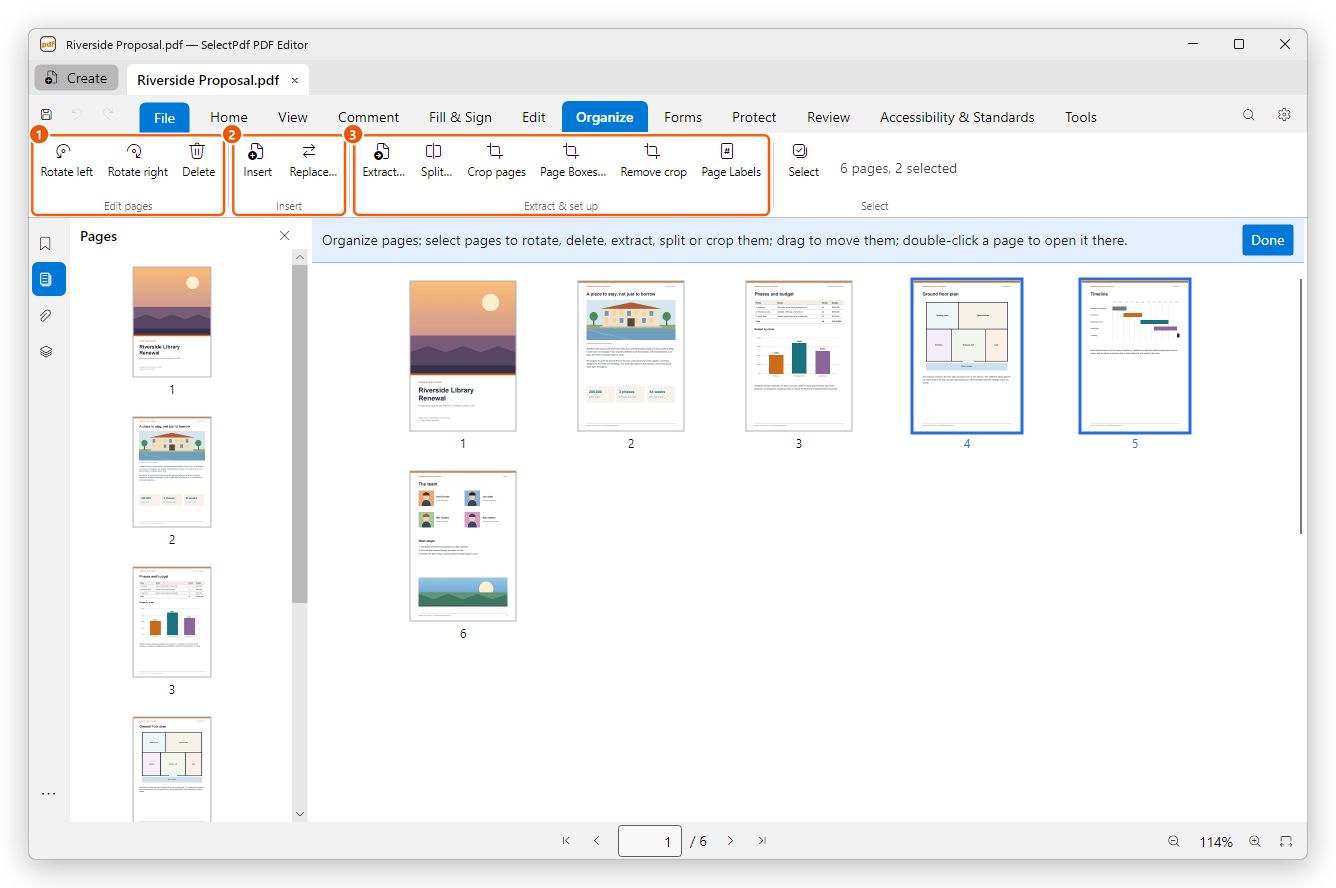
- Edit pages: rotate and delete the selected pages.
- Insert: add pages from a file, the clipboard, a scanner or a web page, or a blank page; or replace pages.
- Extract & set up: save pages as a new file, split the document, crop pages, and number them (page boxes and labels).
To go back to the document, click Done on the blue bar above the pages or press Esc. Double-click a page to go back and open the document at that page.
Select pages
- Click a page to select it.
- Hold Ctrl and click to add pages to the selection or take them out.
- Click the first page, hold Shift and click the last to select all the pages between them.
- Press Ctrl+A to select all the pages, or click Select on the ribbon and choose All Pages, Even Pages, Odd Pages, Portrait Pages or Landscape Pages.
The ribbon shows how many pages the document has and how many are selected. The tools work on the selected pages.
Rotate, delete and move pages
- Rotate: select the pages and click Rotate left or Rotate right. Each click turns them a quarter turn.
- Delete: select the pages and click Delete on the ribbon, or press Delete. A document keeps at least one page.
- Move: drag the selected pages to their new place. A line shows where they will go.
Insert pages
To insert the pages of another file:
- Select the page the new pages go next to.
- Click Insert, then From File…, and choose the file. It can be a PDF, or a picture, a Word, Excel or PowerPoint document or another file the editor converts to PDF.
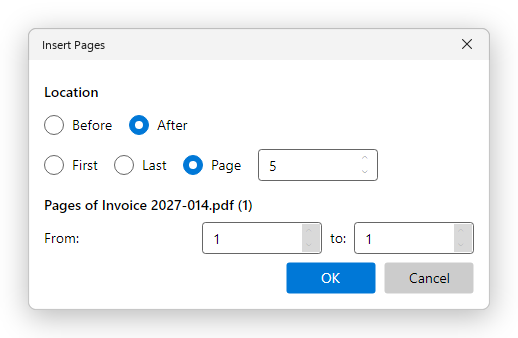
- In the Insert Pages dialog, choose where the pages go (Before or After the First, the Last or a given page) and which of its pages to insert.
- Click OK.
You can also drag PDF files from Windows Explorer between the pages.
The Insert menu also has Blank Page (after the selected page), From Clipboard, From Scanner… when a scanner is connected, and From Web Page…, which needs Pro. Replace… puts the pages of another file in place of the selected pages; see Replace pages.
Extract pages
Extracting saves pages as a new PDF; the document keeps them unless you ask otherwise.
- Select the pages to extract.
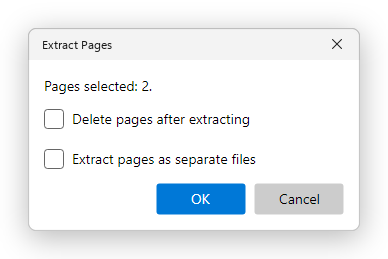
- Click Extract….
- Tick Delete pages after extracting to take them out of the document, and Extract pages as separate files to make one file for each page.
- Click OK, then choose the name of the new file, or the folder for the separate files.
Split a document
Splitting makes several smaller files from the document. The document itself does not change.
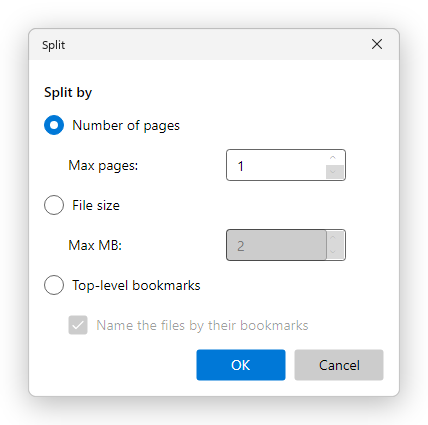
- Click Split….
- Choose how to split: by Number of pages (the most pages in each file), by File size, or at the Top-level bookmarks (tick Name the files by their bookmarks to name each file after its bookmark).
- Click OK and choose the folder for the new files.
Crop pages, page boxes and page labels
The Extract & set up group also crops pages (Crop pages, Page Boxes…, Remove crop) and numbers them your own way, such as i, ii, iii for the front matter (Page Labels). See Crop pages, page boxes and page labels.
Every change can be undone with Undo (Ctrl+Z). Save the document to keep them.