Layers
Show and hide a document's layers, lock, rename, arrange, merge, flatten and delete them, set their properties, add new layers, and import a page or a picture as a layer.
Some documents keep parts of their pages in layers (also called optional content): a plan with its furniture, its dimensions and its notes, a map with its roads and its labels, a form in several languages. Each layer can be shown or hidden, so readers see only what they need, and print only what they want on paper.
Show and hide layers
- Click Layers in the bar at the left of the window. The panel lists the document's layers, in its own order; layers can be nested.
- Untick a layer to hide it, tick it to show it again.
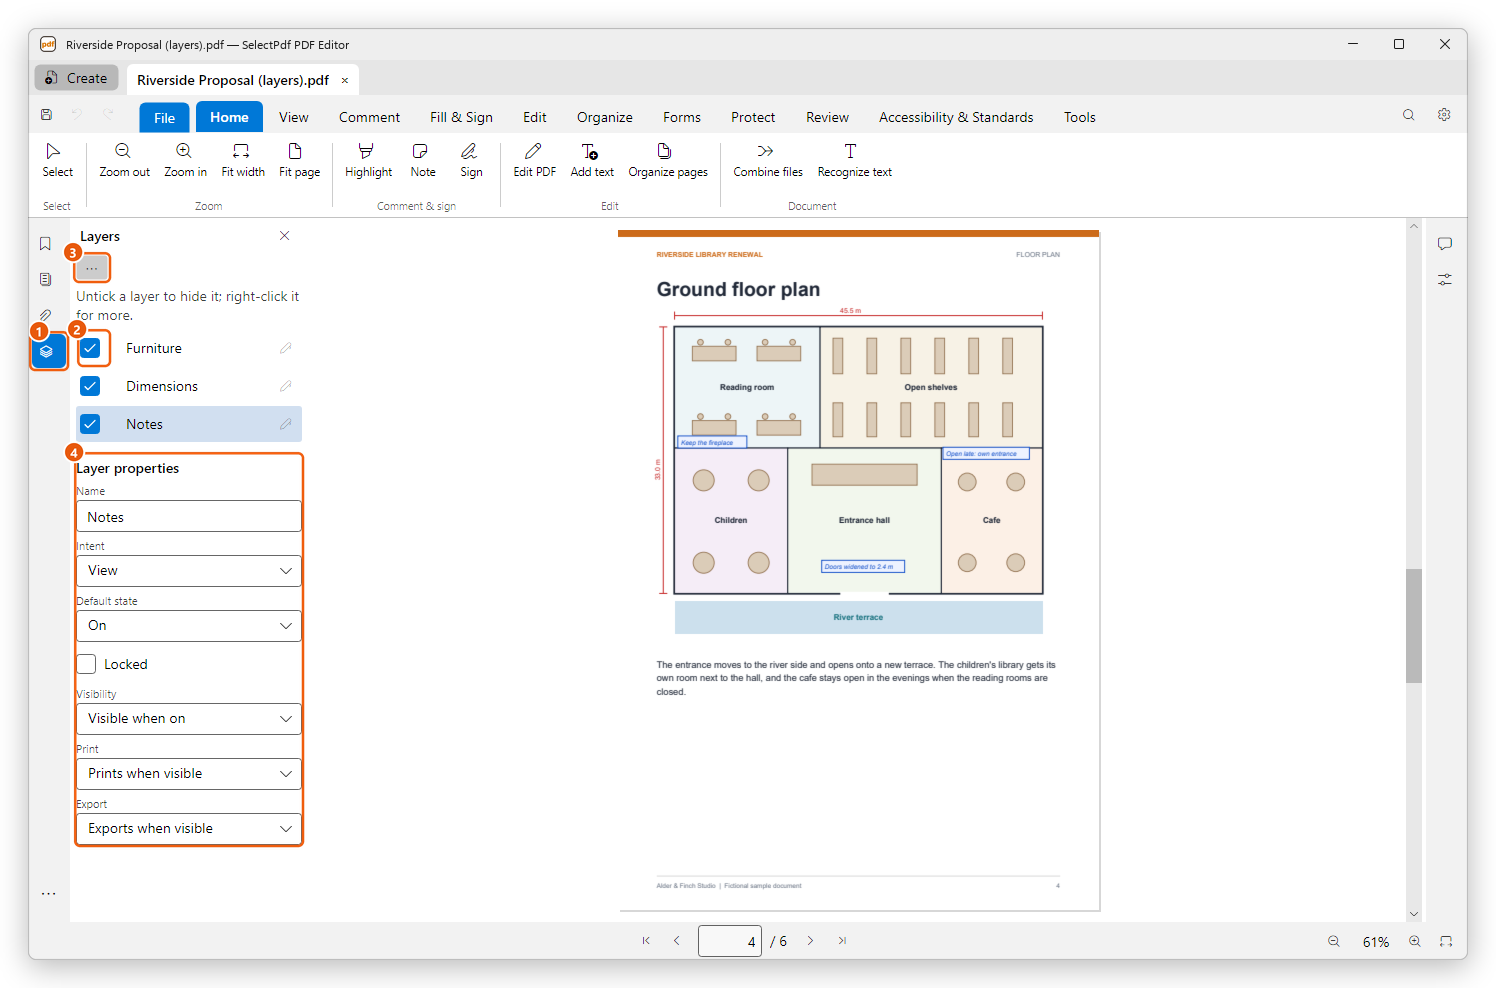
- Layers: opens the panel.
- Tick or untick a layer to show or hide what it draws.
- Options (the three dots): add, import, merge and flatten layers.
- The selected layer's properties.
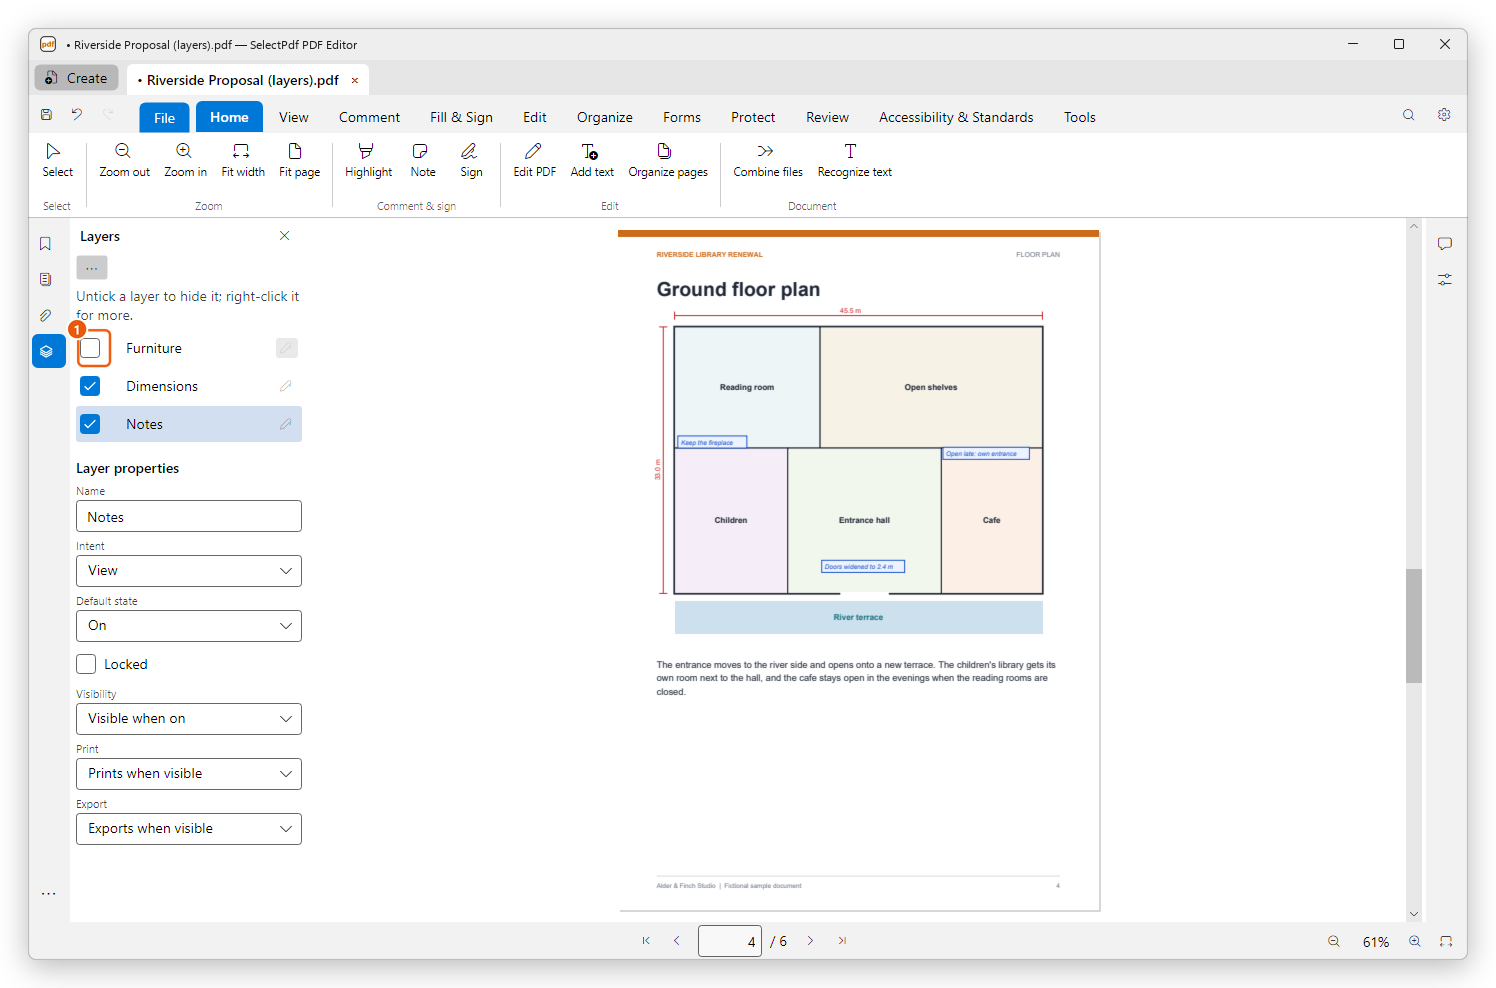
What you show or hide is how the document opens from now on, for you and for anyone you send it to: it is a change to the document, kept when you save it, and Undo (Ctrl+Z) takes it back. A locked layer, marked with a padlock, cannot be shown or hidden until it is unlocked.
A link or a bookmark can show, hide or toggle layers too: see the action Set layer visibility in Links and actions.
Work with a layer
Right-click a layer for its menu:
- Rename layer…: a new name. You can also double-click the layer and type the name in its properties.
- Lock layer and Unlock layer: a locked layer cannot be shown or hidden.
- Merge into: moves everything the layer draws into another layer, and removes this one.
- Arrange: Bring to front, Bring forward, Send backward or Send to back puts everything the layer draws, on every page, in front of or behind what the other layers draw.
- Delete layer…: asks what happens to what the layer draws. Delete with its content removes it from the pages; Keep the content on the page leaves it there, always shown, in no layer.
The current layer
Click the pen at the right of a layer to make it the current layer: what you then add with Edit PDF (text, pictures, shapes) goes into it. A note under the list names the current layer. Click the pen again for none. A hidden or locked layer cannot be the current layer.
Layer properties
Click a layer to show its properties under the list. A change is made as soon as you choose it.
- Name: the layer's name (press Enter to keep a new one).
- Intent: View for a layer readers turn on and off; Reference for one kept for the people who make the document.
- Default state: On or Off, how the layer is when the document opens.
- Locked: as Lock layer.
- Visibility: Visible when on, Never visible or Always visible, whatever its check box says.
- Print: Prints when visible, Never prints or Always prints. Use it for notes that should show on screen but never on paper, or a watermark only for paper.
- Export: Exports when visible, Never exports or Always exports, for other programs that save the document in other formats.
Add, merge and flatten layers
Click Options (the three dots at the top of the panel):
- Add Layer…: a new, empty layer. Make it the current layer to add content into it.
- Import as Layer…: a page of another PDF, or a picture, as a layer (see below).
- Put Other Content in a Layer…: everything on the pages that is in no layer goes into the layer you choose (a new one, or one of the document's), for the pages you choose. Content already in a layer stays where it is; comments and form fields are not moved.
- Merge Layers…: tick the Layers to merge, choose the layer they go Into the layer, and click Merge.
- Flatten Layers: the document no longer has layers. What the visible layers draw stays on the pages, always shown; what the hidden layers draw is removed. The editor asks first.
Import a page or a picture as a layer
Use it to lay a plan over a site photo, a signature or a stamp over a page, or a translated version over the original, in a layer of its own that readers can turn on and off.
- Click Options, then Import as Layer….
- Under Source, click Browse… and choose a PDF or a picture. For a PDF, choose its Page number, or tick Page by page to put its pages one after another on the pages you choose.
- Under Layer, choose Create new layer and type its name, or Add to layer and choose one of the document's layers.
- Place it: Vertical and Horizontal alignment with offsets in points, the Rotation (degrees), the Scale (%) (tick Relative to target page to scale it to the page), the Opacity, and On top of the page or Behind the page.
- Under Pages, choose All, Current page or the pages to put it on.
- Check the preview of the current page, at the right, and click OK.
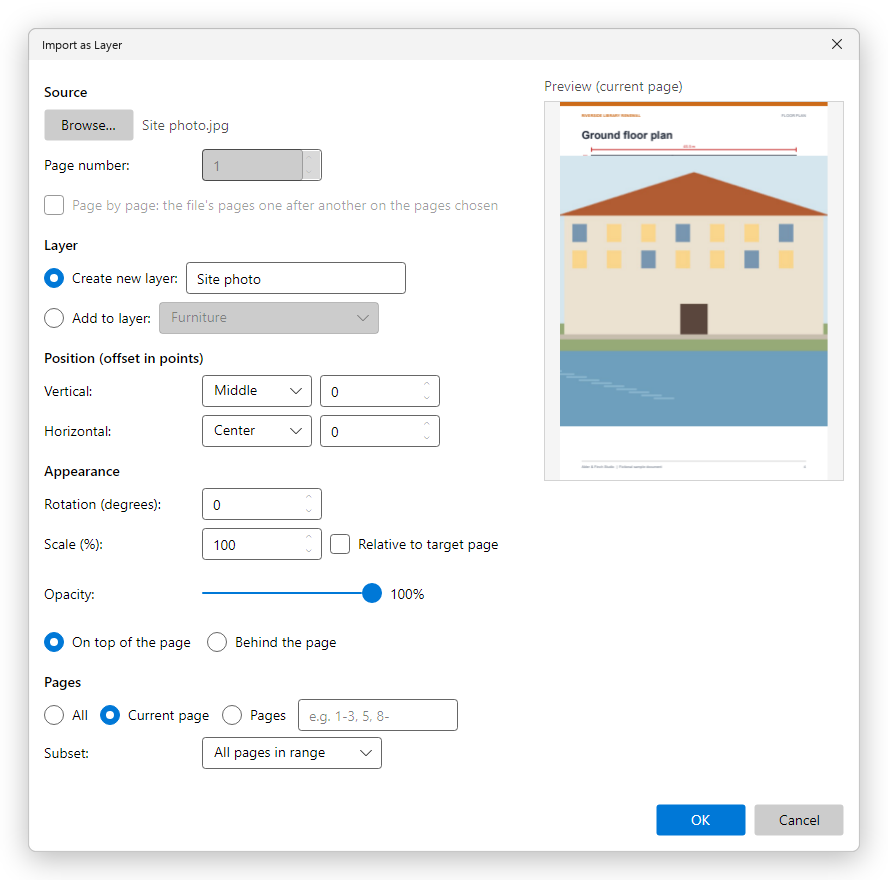
The new layer is selected in the Layers panel.
Working with layers is free: show, hide, lock, rename, arrange, add, merge, flatten and delete them, and set their properties. Import as Layer… needs Pro, as it adds new content to the pages.
Headers, footers and watermarks can also be put in a layer of their own, so readers can switch them off.