Fill in a form
Type in the fields of a PDF form, tick its boxes, pick dates and pictures, let the form work out its totals, sign it and send it, fill forms that have no fields with Fill & Sign, and save the filled form.
Many PDF forms have fields: boxes you can type in and tick. Others are only a picture of a form, printed to PDF, with lines to write on. The editor fills both.
Fill in a form's fields
- Open the form. Its fields are tinted, so you can see where to type.
- Click a field and type. Press Tab to go to the next field, Shift+Tab to go back.
- Click a check box or a round option button to tick it. Click a list to choose one of its values.
- When you are done, save the document (Ctrl+S).
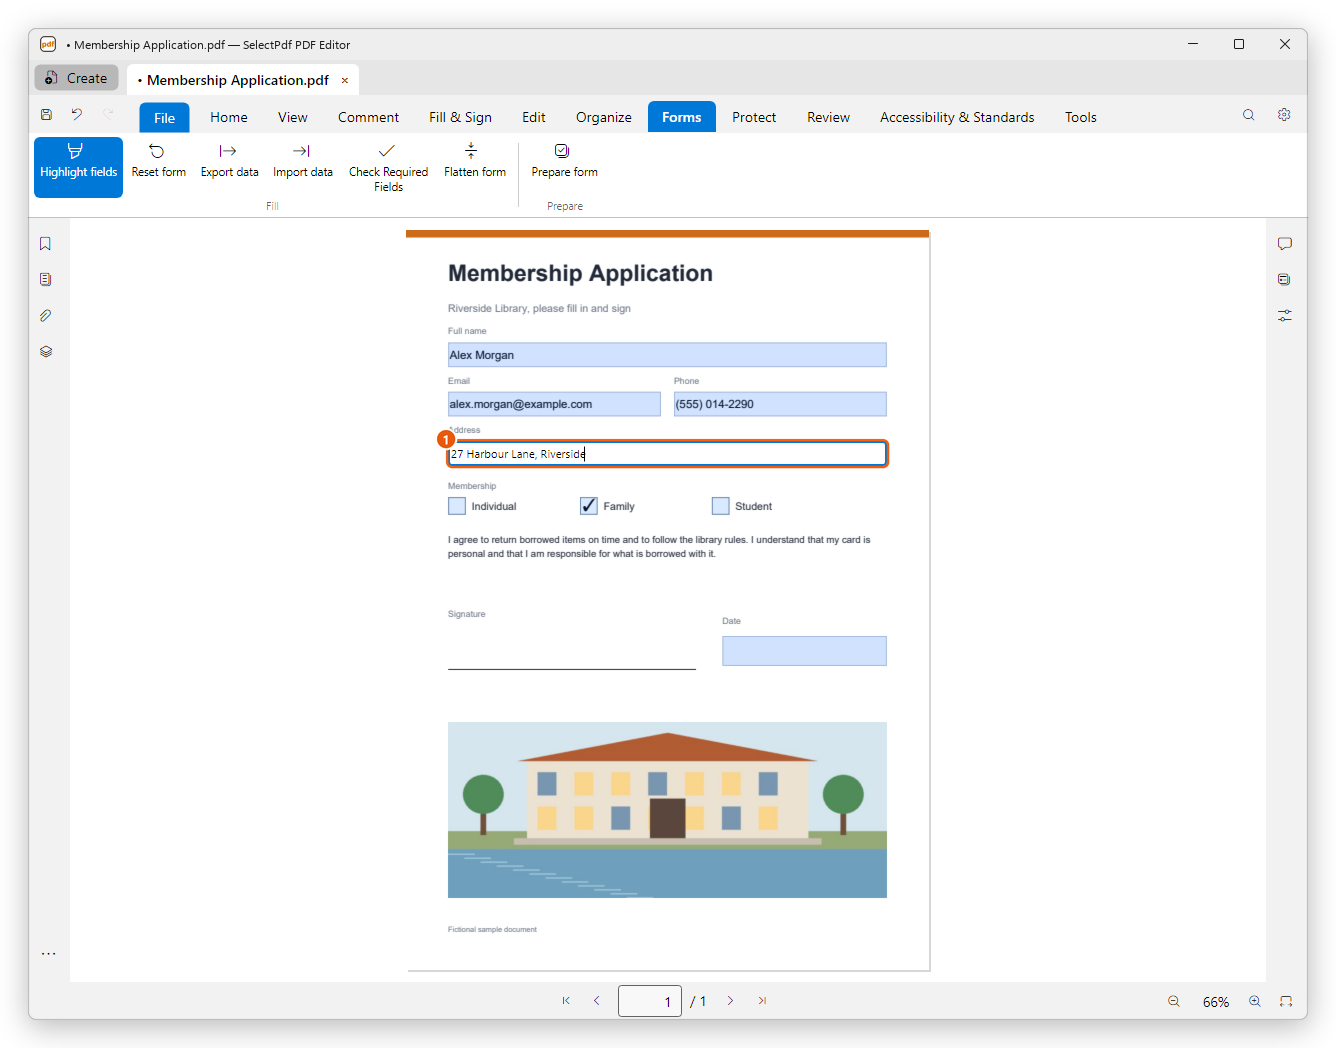
- The field you are typing in.
Enter or a click elsewhere keeps what you typed, and Esc cancels it. In a field with several lines, Enter starts a new line. Undo (Ctrl+Z) takes back a filled field.
A date field shows a ▾ button next to it while you type in it. Click it to pick the day from a calendar: the date is written in the form's own format.
Some fields do more than take text:
- An image field: click it to choose a picture (PNG, JPEG, TIFF, BMP, GIF or WebP), for example a photo for a card.
- A signature field: click it, then choose Draw a Signature to sign with your handwriting, or Sign with ID to sign with a digital ID. See Sign a PDF and Digital signatures.
- A button: click it to do what the form says, for example clear the form or send it.
Forms that calculate and check
Many forms work out values by themselves: an amount from a quantity and a price, a total, a date. As soon as you leave a field, the form calculates again and shows the results in their format, such as $478.80. Calculated fields are usually read-only: the form fills them, not you.
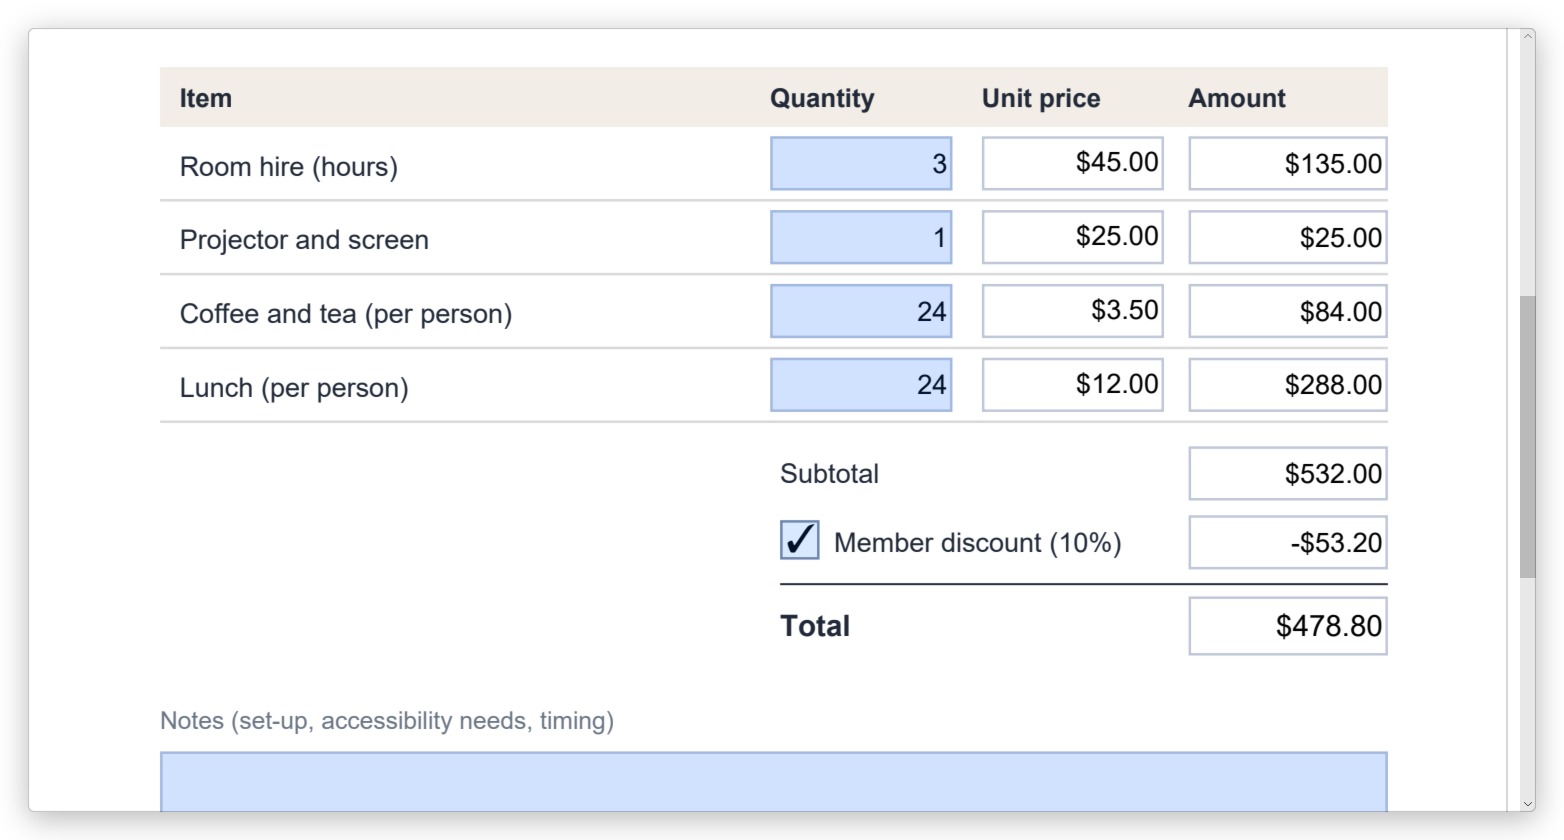
A form can also refuse a value: a quantity out of range, letters in an amount, a date that does not exist. A message says what the field accepts, and the field keeps its value from before. Type another value.
The form's scripts do this work: see JavaScript. To add calculations to a form of your own, see Calculate, format and check values.
The Forms tab
The Forms tab has the tools for filling forms in its Fill group.

- Highlight fields turns the tint of the fields on or off. Required fields, the ones the form needs before it can be sent, have a red outline.
- Check Required Fields names the required fields that are still empty, in the status bar, and goes to the first of them.
- Reset form clears every field to its starting value. The editor asks first.
- Export data saves what was typed in the fields in a file (FDF, XFDF, XML or JSON), and Import data fills the form from such a file. Use them to fill the same form again, or to send the answers without the whole PDF.
- Flatten form makes the filled fields part of the page: the answers stay, but can no longer be changed. Signature fields are kept.
Filling in and saving forms is free. Export data, Import data and Flatten form need Pro, as do Prepare form and the other tools that make or change fields.
Send a form
A form may have a button that sends it, for example Submit. When you click it:
- The editor checks the required fields first. While one is empty, the form is not sent: a message names the empty fields, and the page of the first one is shown.
- A form sent to a web address asks you first, naming the place it goes to. Click Send to send the form's data, or Cancel. When the answer holds form data, the form is filled in with it.
- A form sent by email saves its data in a file: click Save and Email, choose where to save the file, and a new email opens in your email app, to the form's address. Depending on your email app, the file is attached, or its folder opens for you to attach it. Nothing is sent until you send the email.
Sending the form sends what is typed in it, not your copy. Save the document too if you want to keep your answers.
Fill a form that has no fields
When a form has nothing to click, use the Fill & Sign tab to write on it.
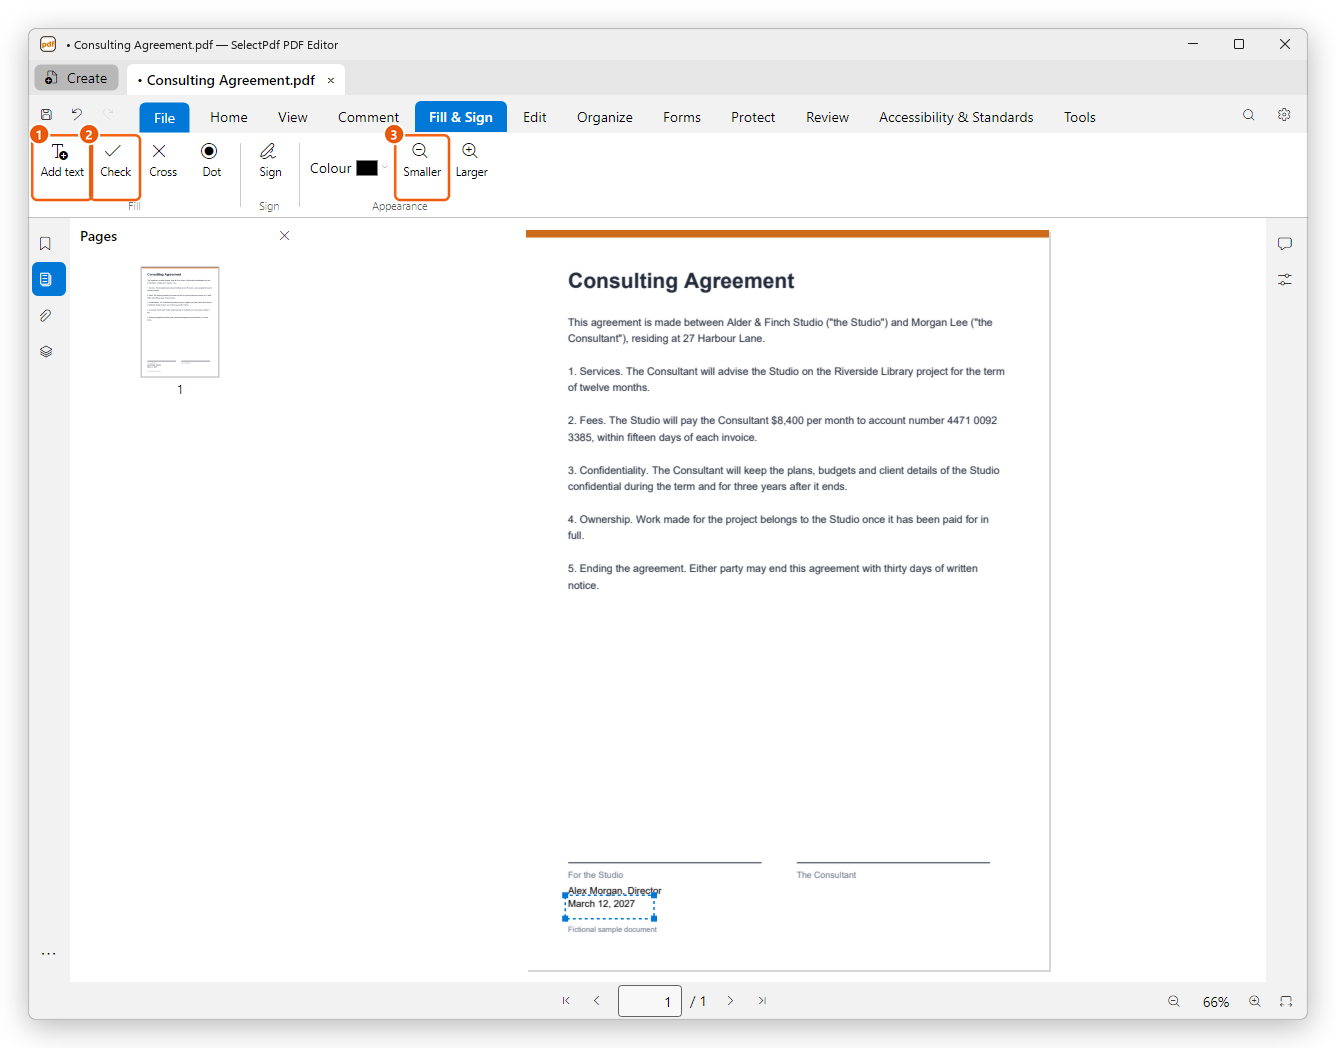
- To add text, click Add text, then click the page where the text starts. Type it and click OK.
- To tick a box, click Check (or Cross or Dot), then click the page where the mark goes.
- To make a selected text or mark smaller or larger, click Smaller or Larger. With nothing selected, they set the size of what you add next. Colour works the same way.
To move what you added, drag it. To remove it, select it and press Delete.
To sign the form, see Sign a PDF.
Save the filled form
Click Save (Ctrl+S) to keep your answers in the PDF. To keep the empty form as it was, use Save As and give the filled form another name.
Related pages
- Create a form: add fields to a PDF, or change a form's fields.
- Form field properties: what makes a field required, read-only, a list or a date.
- Calculate, format and check values: totals, amounts and checks.
- JavaScript: the scripts that forms run.