Rulers, grid and guides
Measure and line things up on the page with the rulers, the layout grid, guides and Snap to grid, and copy part of a page as a picture with Snapshot.
When you place comments, form fields, text or pictures, the layout aids help you put them exactly where they belong and line them up. They are on the View tab, in the Layout aids group. They only change what you see on the screen: nothing of them is saved in the document or printed.
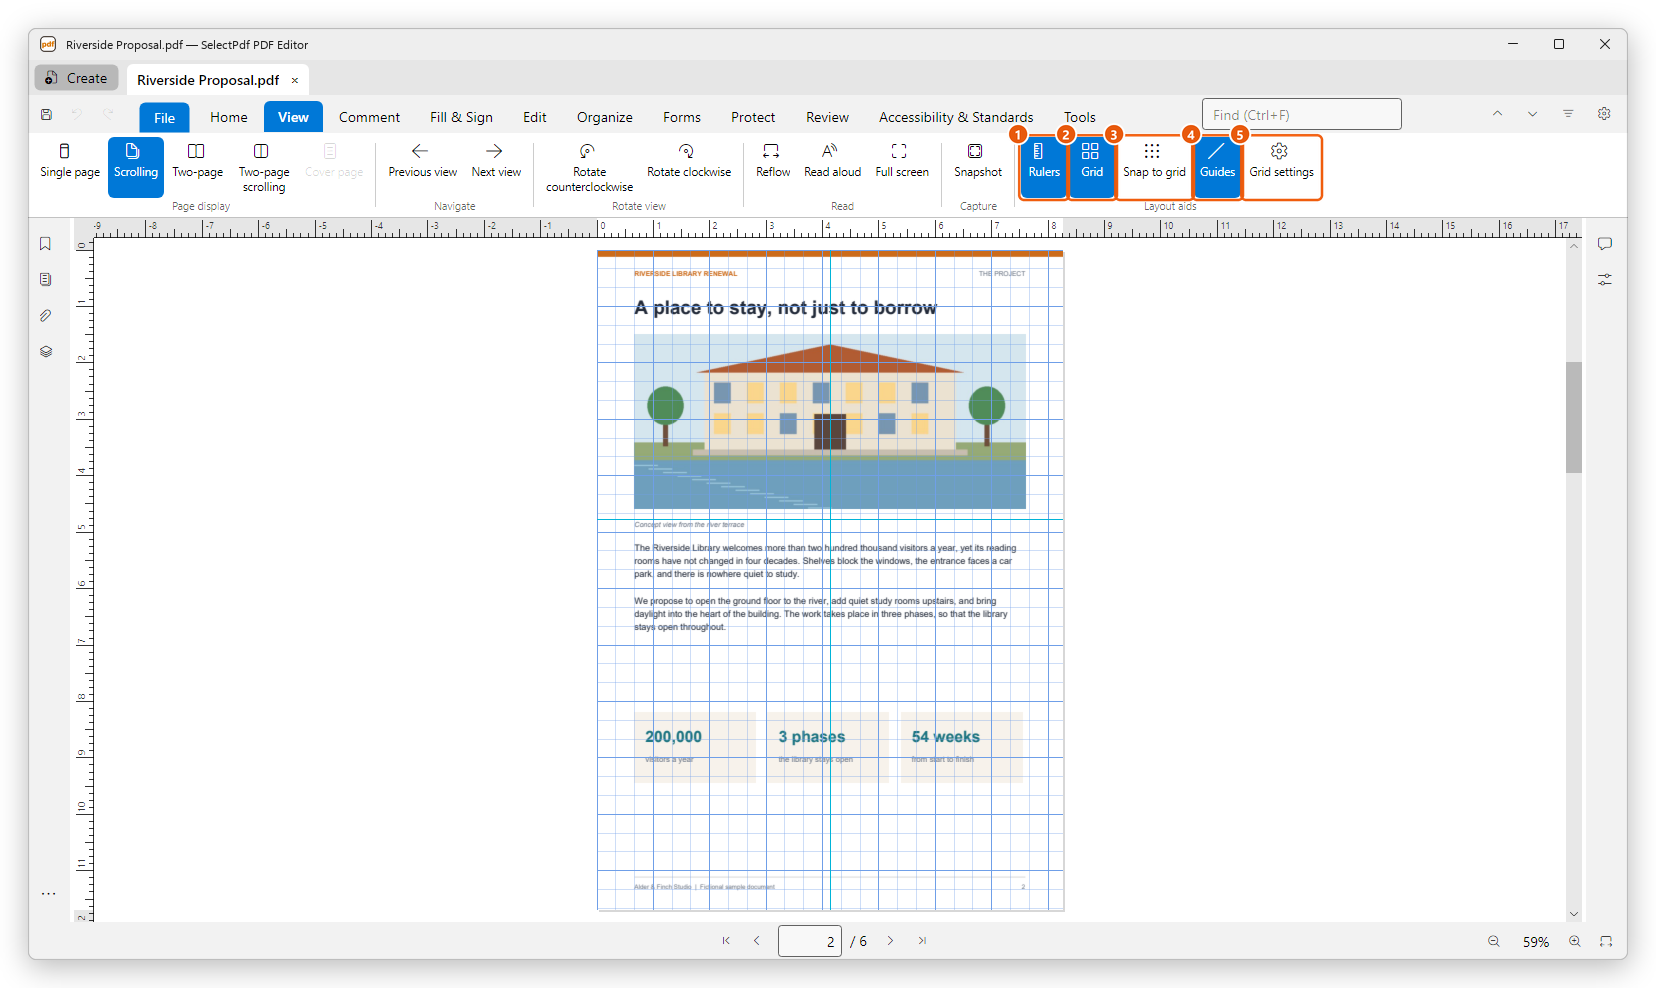
- Rulers (Ctrl+R) along the top and the left of the pages.
- Grid (Ctrl+U): lines across the pages at regular distances.
- Snap to grid (Shift+Ctrl+U): what you draw, move or resize lands on the grid's lines.
- Guides: show or hide the guides you made.
- Grid settings: the units, the grid's spacing and colour, and the guides' colour.
Click a button again to turn it off. The editor remembers which are on, also the next time you start it.
Rulers
The rulers count from the top left corner of the page under the pointer (or of the current page), and a mark on each ruler follows the pointer, so you can read where on the page you are.
To change the unit, right-click a ruler and choose Points, Picas, Millimeters, Centimeters or Inches. Both rulers take it.
Grid
The grid draws lines over the pages, every inch at first, each square divided in three. Turn on Snap to grid and everything you draw, move or resize, such as a rectangle, a form field or a picture in Edit PDF, lands on the nearest line, also on the lines of the subdivisions. Snap to grid works whether or not the grid is shown.
Guides
A guide is a line across a page, which you place where you want to line things up.
- Turn on the Rulers.
- Drag from the top ruler down onto the page for a horizontal guide, or from the left ruler onto the page for a vertical one.
- Let go where you want the guide. With Snap to grid on, it lands on the grid's lines.
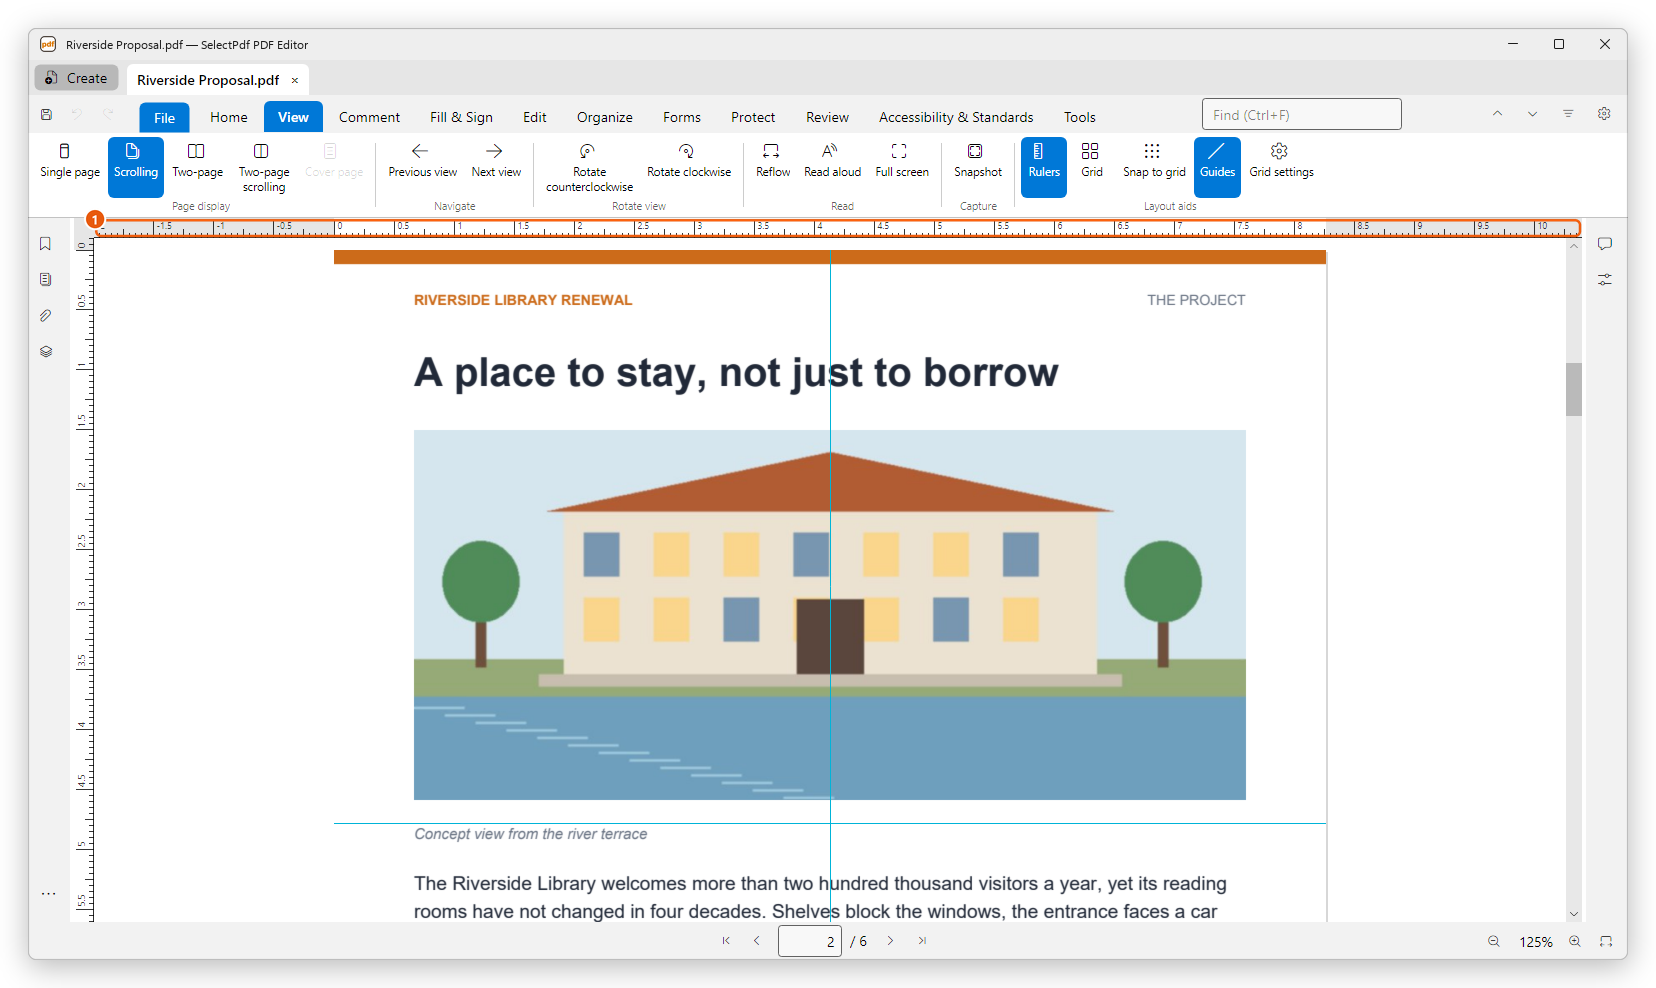
To move a guide, choose the Select tool and drag the guide; the pointer changes when it is over one. To remove a guide, drag it off the page, back onto a ruler.
Each document has its own guides, kept while it is open. They are not saved in the file. Guides on the View tab hides them without removing them, and shows them again.
Grid settings
Click Grid settings on the View tab. Preferences opens at Units and Guides.
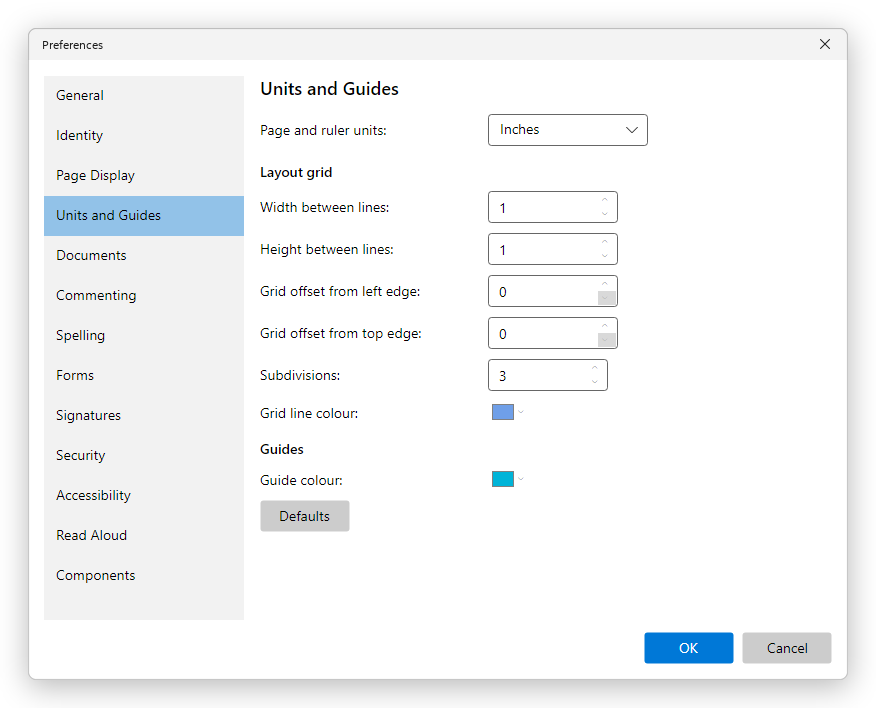
- Page and ruler units: the unit of the rulers and of the distances on this page.
- Width between lines and Height between lines: the size of the grid's squares.
- Grid offset from left edge and Grid offset from top edge: where the first line starts, from the page's top left corner.
- Subdivisions: in how many parts each square is divided.
- Grid line colour and Guide colour: click a colour to choose another.
- Defaults brings back the grid of one inch with three subdivisions and the usual colours.
Click OK to use the new settings.
Copy part of a page as a picture
Snapshot, in the Capture group of the View tab, copies part of a page as a picture, as you see it on the screen, to paste in an email, a presentation or a document.
- On the View tab, click Snapshot.
- Drag a rectangle round what you want to copy. To copy the whole page, click it instead.
- The editor says The selected area has been copied. Paste the picture in the other app (Ctrl+V).
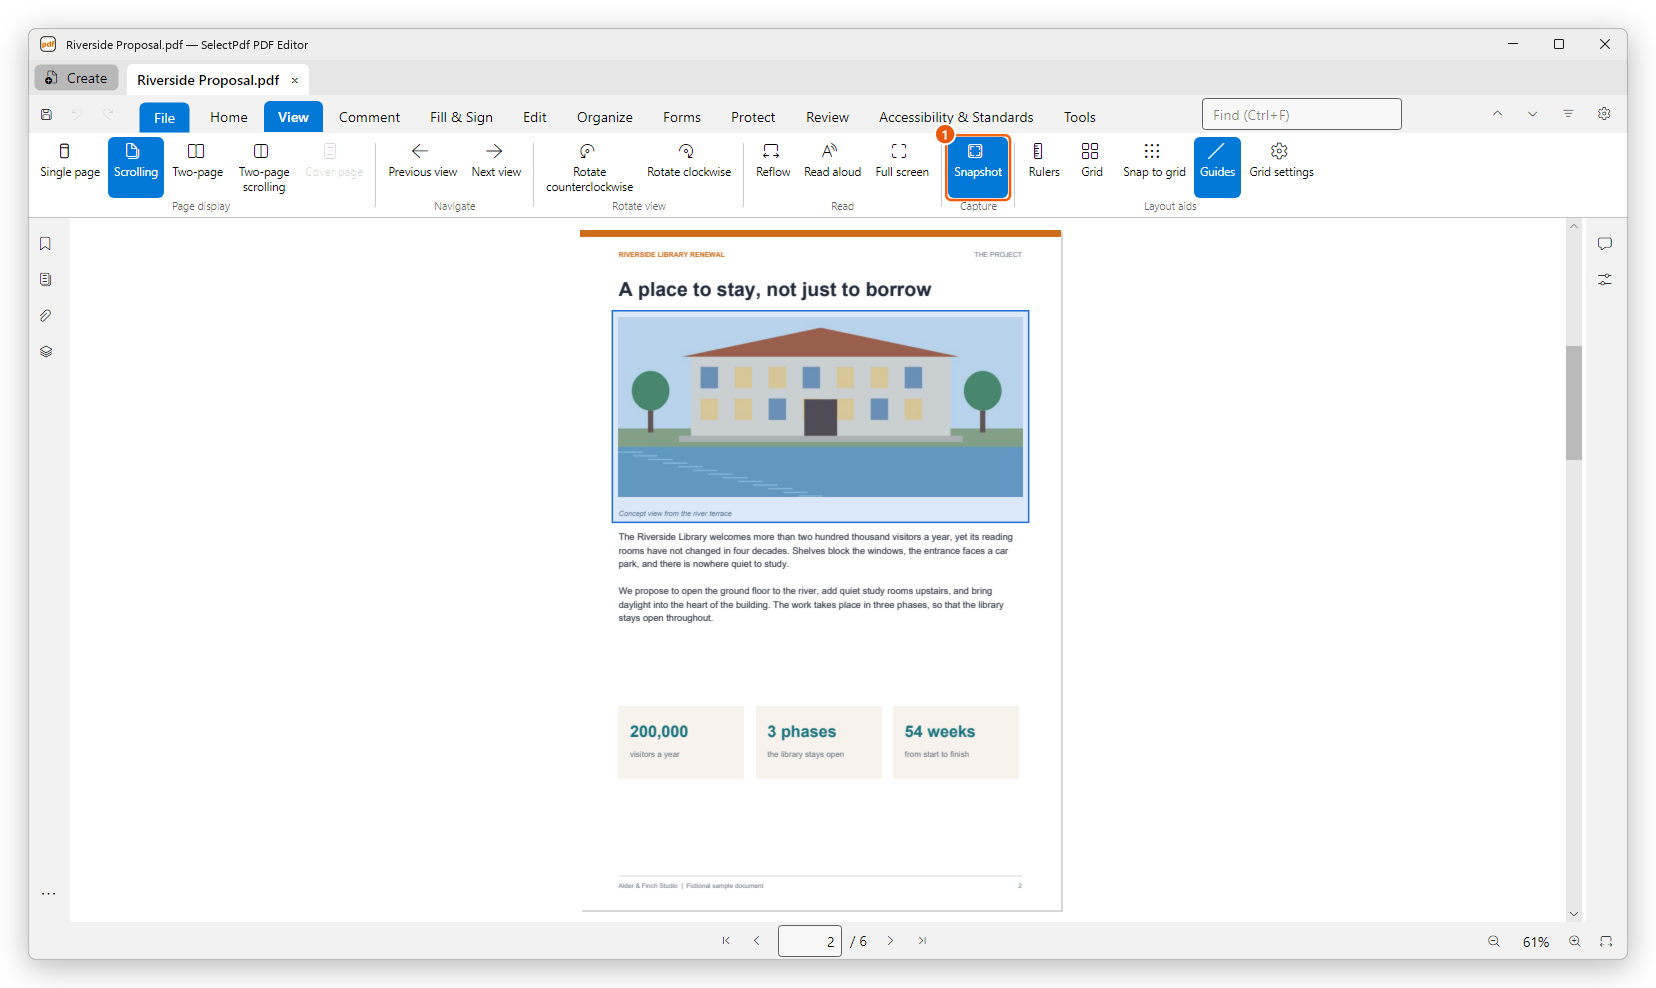
The tool stays on, so you can copy more parts. Click Snapshot again, or press Esc, to stop. The picture is taken at the zoom you see the page at: zoom in first for a sharper picture. With the view turned (Rotate clockwise on the View tab), the picture is turned too.
To copy the text of a page instead of a picture of it, select it with the Select tool and press Ctrl+C.