Tags and reading order
Look at and correct the tags of a PDF in the Tags panel, edit tag properties, alternate text and the role map, fix the reading order and tag content by hand with the Reading Order tool, and set up table headers for PDF/UA.
The tags of a PDF are its structure, the way a screen reader or another assistive technology reads it: which text is a heading, a paragraph, a list, a table or a figure, and in which order they come. Autotag Document builds the tags from the content of the pages. When the result needs correcting, or when the Accessibility Check or the PDF/UA check reports a problem, you fix the tags with the two tools on this page:
- the Tags panel shows the whole structure as a tree, and the properties of each tag;
- the Reading Order tool shows the structure on the page, and lets you tag content by drawing a rectangle round it.
Both are on the Accessibility & Standards tab, in the Make accessible group. Their panels open on the left, among the More panels of the left side.
Looking at the tags and the reading order is free. Changing them needs Pro: every tag command, the tag properties and attributes, the role map, the Reading Order tool's buttons, the Table Editor and Autotag Document.
The Tags panel
Click Tags on the Accessibility & Standards tab. The panel shows the tag tree, under its root, Tags:
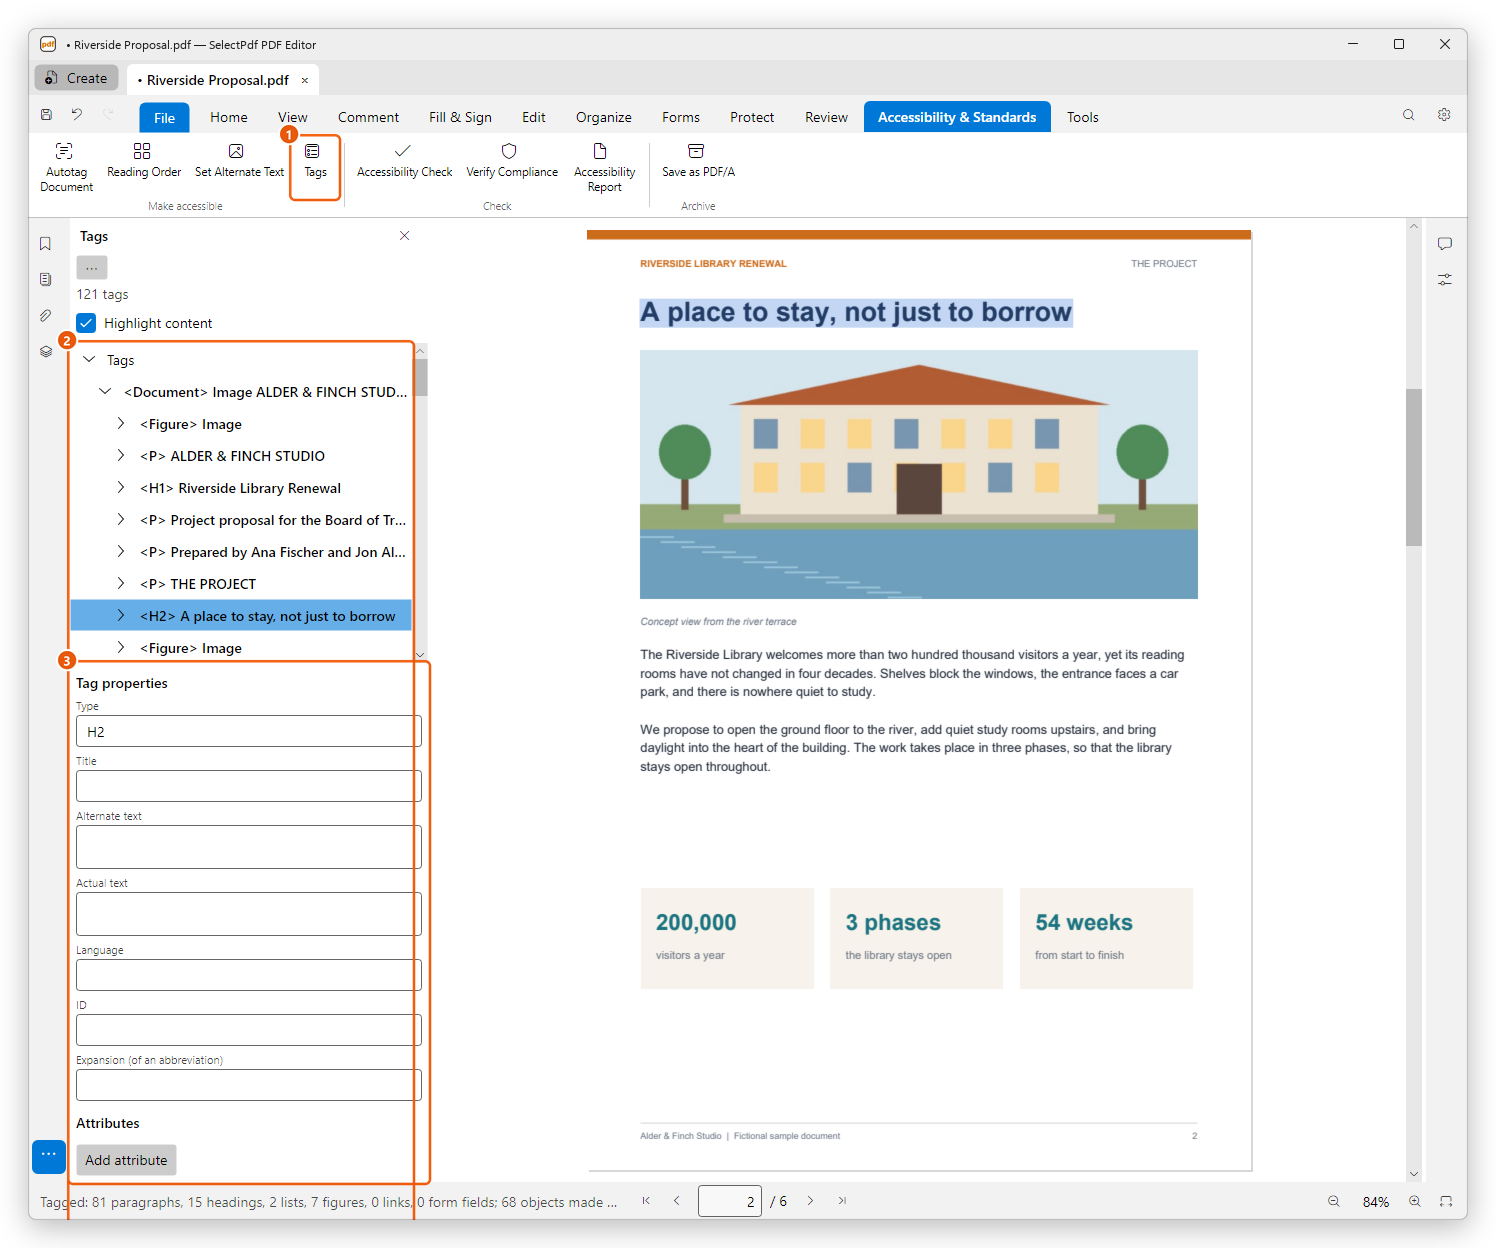
- Tags on the ribbon.
- The tag tree: each tag with its type in angle brackets, such as
<H1>or<P>, followed by its title or the start of its text. Under a tag are the tags inside it and its content: the text it holds, an Image, a Path (a drawing), or an annotation such as a link or a form field. - Tag properties: what the selected tag is and says.
The line above the tree says how many tags the document has. When the document has no tags, it says so: tag it with Autotag Document, or tag its content with the Reading Order tool.
- Click a tag to select it. The page shows where its content is, on the page it starts on.
- Tick Highlight content to outline the selected tag's content on the page, as in the picture.
- Click the arrow before a tag to open or close it.
Move, add and delete tags
- Move a tag by dragging it in the tree: a line shows where it goes, before or after another tag, or into it. Or select it, choose Cut from the options, select where it goes, and choose Paste (after the selected tag) or Paste Child (inside it).
- Add a tag: select the tag (or the root) it goes into, choose New Tag…, and type its type, such as P, H2 or Figure.
- Delete a tag: select it and press Delete, or choose Delete Tag. The tags inside it go too; their content stays on the page, untagged.
- Make something decoration: choose Change Tag to Artifact. The content becomes an artifact, which screen readers skip: a page number, a rule line, a background picture.
The options are in the menu of the ⋯ button above the tree (Tag options), and in the menu of a right-click on a tag:
| Option | What it does |
|---|---|
| New Tag… | Adds a tag inside the selected one. |
| Cut, Paste, Paste Child | Move the selected tag to another place in the tree. |
| Delete Tag | Removes the tag and the tags inside it; their content stays, untagged. |
| Find Tag from Selection | Selects the tag of the object selected on the page with Edit PDF. |
| Create Tag from Selection | Tags the objects selected on the page with Edit PDF, with the type you type. |
| Change Tag to Artifact | Makes the tag's content decoration, which screen readers skip. |
| Edit Role Map… | Says which standard type each custom tag type stands for (see below). |
| Autotag Document | Builds the tags again from the content of the pages. |
Each change is one step that Undo (Ctrl+Z) takes back. The changes are in the document at once; save it to keep them.
Tag properties
Below the tree, Tag properties shows the selected tag. A value applies as soon as you press Enter or leave its box, and the status bar says Applied to the document.
| Property | What it is for |
|---|---|
| Type | The tag's type: choose a standard type (P, H1 to H6, L, LI, Table, TR, TH, TD, Figure, Link and the others) or a custom one from the role map, or type it. |
| Title | A name for the tag, shown in the tree. Screen readers do not read it. |
| Alternate text | What a figure, a formula or a link shows, in words, for people who cannot see it. Screen readers read it instead of the content. |
| Actual text | The exact text of the content, when the page draws it in a way that cannot be read: letters made of drawings, a word split in pieces, a drop capital. |
| Language | The language of this part, when it is not the document's, as a language tag such as fr-FR. |
| ID | A unique name of the tag, which other tags can refer to (for example a table header cell). |
| Expansion (of an abbreviation) | The words an abbreviation stands for, read instead of it. |
To describe all the figures one after another, use Set Alternate Text instead: see Describe the pictures.
Attributes
Attributes add details the standard defines for some tags: the scope of a table header, the number of rows and columns a cell spans, the placement of a figure, the numbering of a list. Click Add attribute, choose the Owner (for example Table or Layout) and the Name from their lists, then the value. The value box shows what it expects: a name from a list, a number, a text, or several values in brackets, such as [0 0 1]. Click ✕ to remove an attribute.
The role map
Documents made by word processors often use their own tag types, such as Title or Body Text. The role map says which standard type each one stands for, so that screen readers and checkers understand it.
- In the Tags panel, choose Edit Role Map… from the options.
- Each row is a custom type and the standard type it is read as. Change a standard type in its list, click Add for a new row, or ✕ to remove one.
- Click OK.
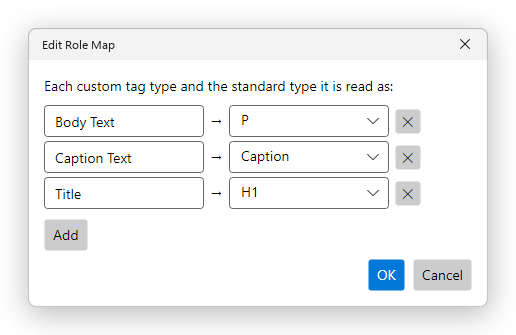
PDF/UA does not allow a custom type to be mapped to another custom type, or a standard type to be mapped to a different one. Map each custom type straight to a standard type.
The Reading Order tool
Click Reading Order on the Accessibility & Standards tab. The panel opens on the left, and the page shows its tagged content as numbered boxes in reading order, each coloured by kind: text, headings, figures, tables, lists and form fields. Content that has no tag is outlined in grey.
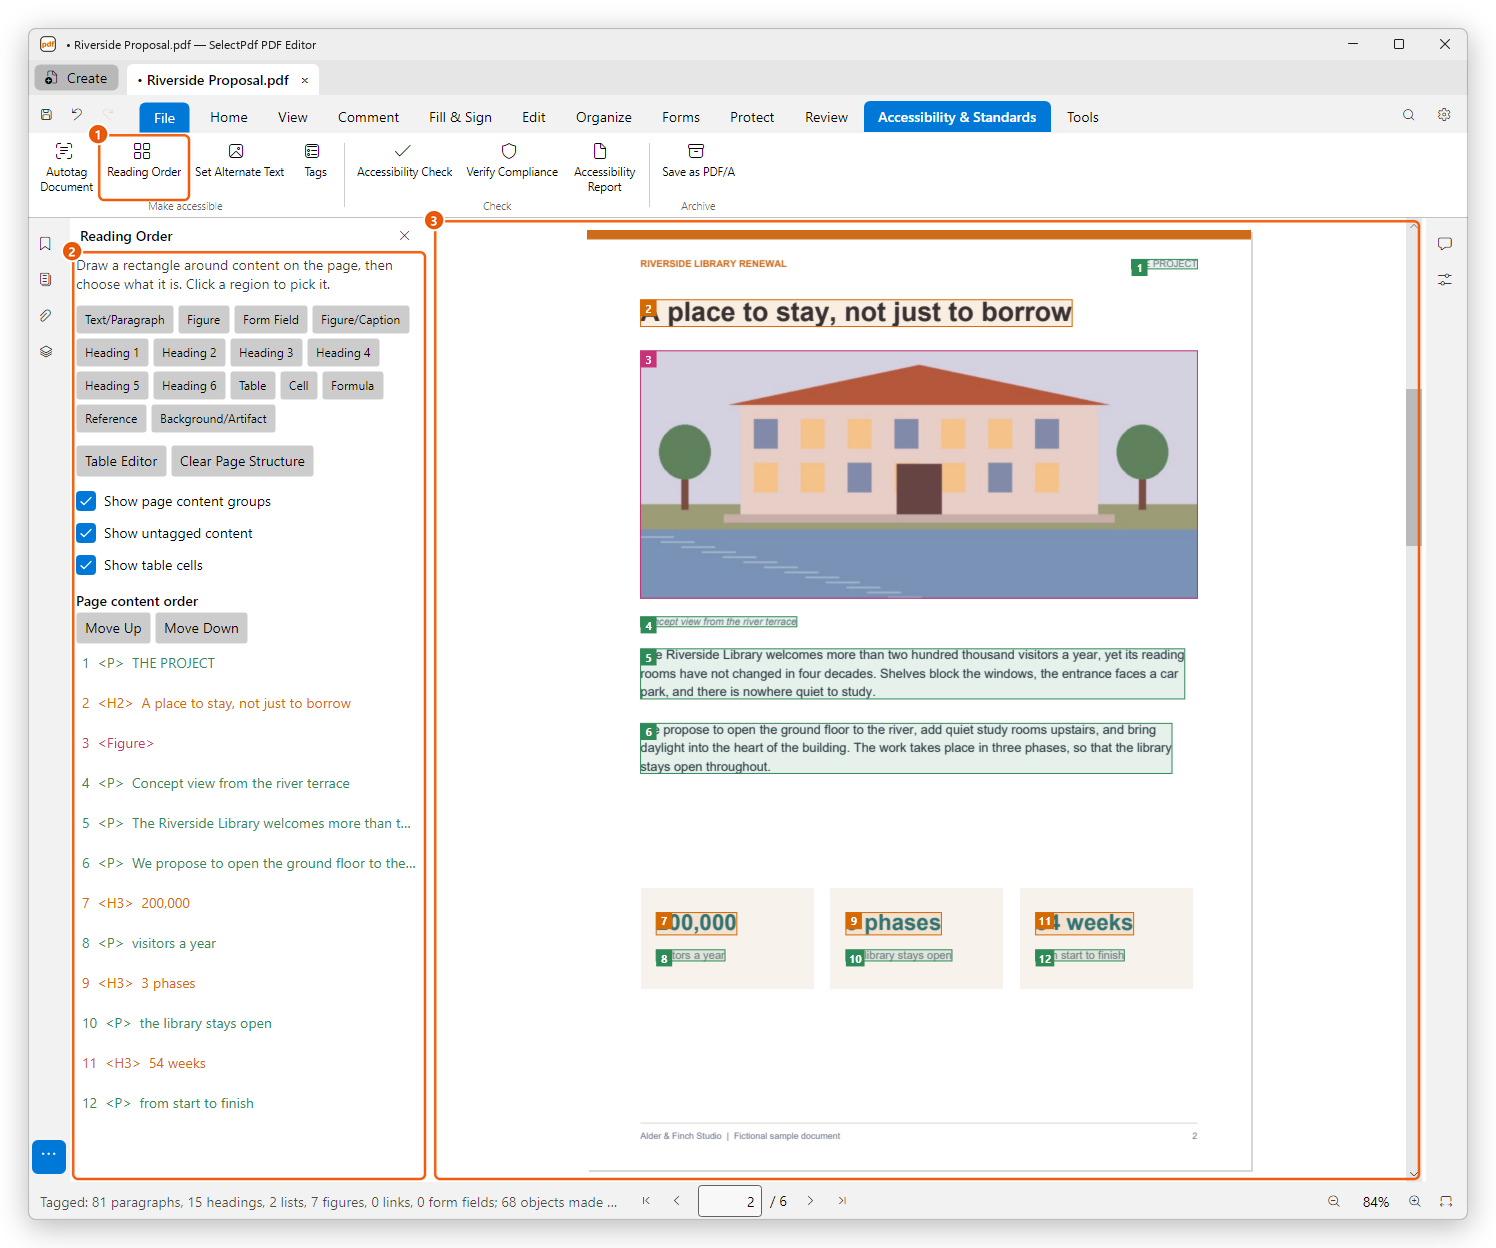
- Reading Order on the ribbon.
- The panel: the buttons that tag what you draw, what the page shows, and the page's order.
- The page, with its regions numbered in the order they are read.
The tool works while its panel is open; when you open another panel, the pointer is the Select tool again. The panel follows the page you are on.
Tag content by drawing
- Drag a rectangle round the content on the page.
- Click what it is: Text/Paragraph, Figure, Form Field, Figure/Caption, Heading 1 to Heading 6, Table, Cell, Formula, Reference, or Background/Artifact for decoration screen readers should skip.
The content in the rectangle gets a tag of that type, which takes its place in the order. If there is nothing in the rectangle, the status bar says so.
To start a page over, click Clear Page Structure: every tag is taken off the page's content, which stays on the page, untagged. Then tag it again by drawing.
The check boxes choose what the page shows: Show page content groups (the numbered regions), Show untagged content, and Show table cells.
Change the reading order
Under Page content order, the panel lists the page's regions in reading order, each with its number, its type and the start of its text. Click a region in the list, or on the page, to pick it.
- Drag a region up or down the list to its place; or
- pick it and click Move Up or Move Down.
The numbers on the page change with the order.
Read a page in the order of its numbers, as a screen reader would: a heading before its text, a caption next to its figure, the columns one after the other.
The Table Editor
For a screen reader to read a table, its header cells must be tagged as headers and say whether they head a row or a column.
- Click the table's region on the page, or tag the table by drawing a rectangle round it and clicking Table.
- Click Table Editor. The cells of the table show on the page.
- Click a cell. Under Table cell properties, tick Header cell, choose its Scope (Row, Column, Both or None), and its Row span and Column span when it covers more than one row or column.
- Click Apply, and go on with the next cell.
Fixing PDF/UA
A typical way to make a document conform to PDF/UA:
- Run Autotag Document, unless the document has good tags from its app.
- Check the reading order of each page with the Reading Order tool, and tag by hand what was missed.
- Mark decoration as artifacts, and describe the figures with Set Alternate Text.
- Set up the header cells of each table with the Table Editor.
- Run Verify Compliance for PDF/UA-1 or PDF/UA-2 (see PDF standards), and fix what it reports. Fix… on a failure opens the tool that fixes it: Set Alternate Text for a figure, the Table Editor for a table, the field's properties for a form field.