Destinations and articles
Name places in a document so links can go to them, and follow or make article threads that lead readers through text in columns and across pages.
Two panels help readers move through a long document. The Destinations panel lists the document's named destinations: places in it with a name, which links can go to. The Articles panel lists its articles: text that runs through several boxes, often in columns or across pages, which readers follow box by box, as in a magazine.
Both panels are in More panels, the three dots at the bottom of the bar at the left of the window.
Named destinations
A link or a bookmark can go to a page, or to a named destination. A link to a named destination keeps working when pages are added, moved or deleted before it, and other documents can link to the place by its name.
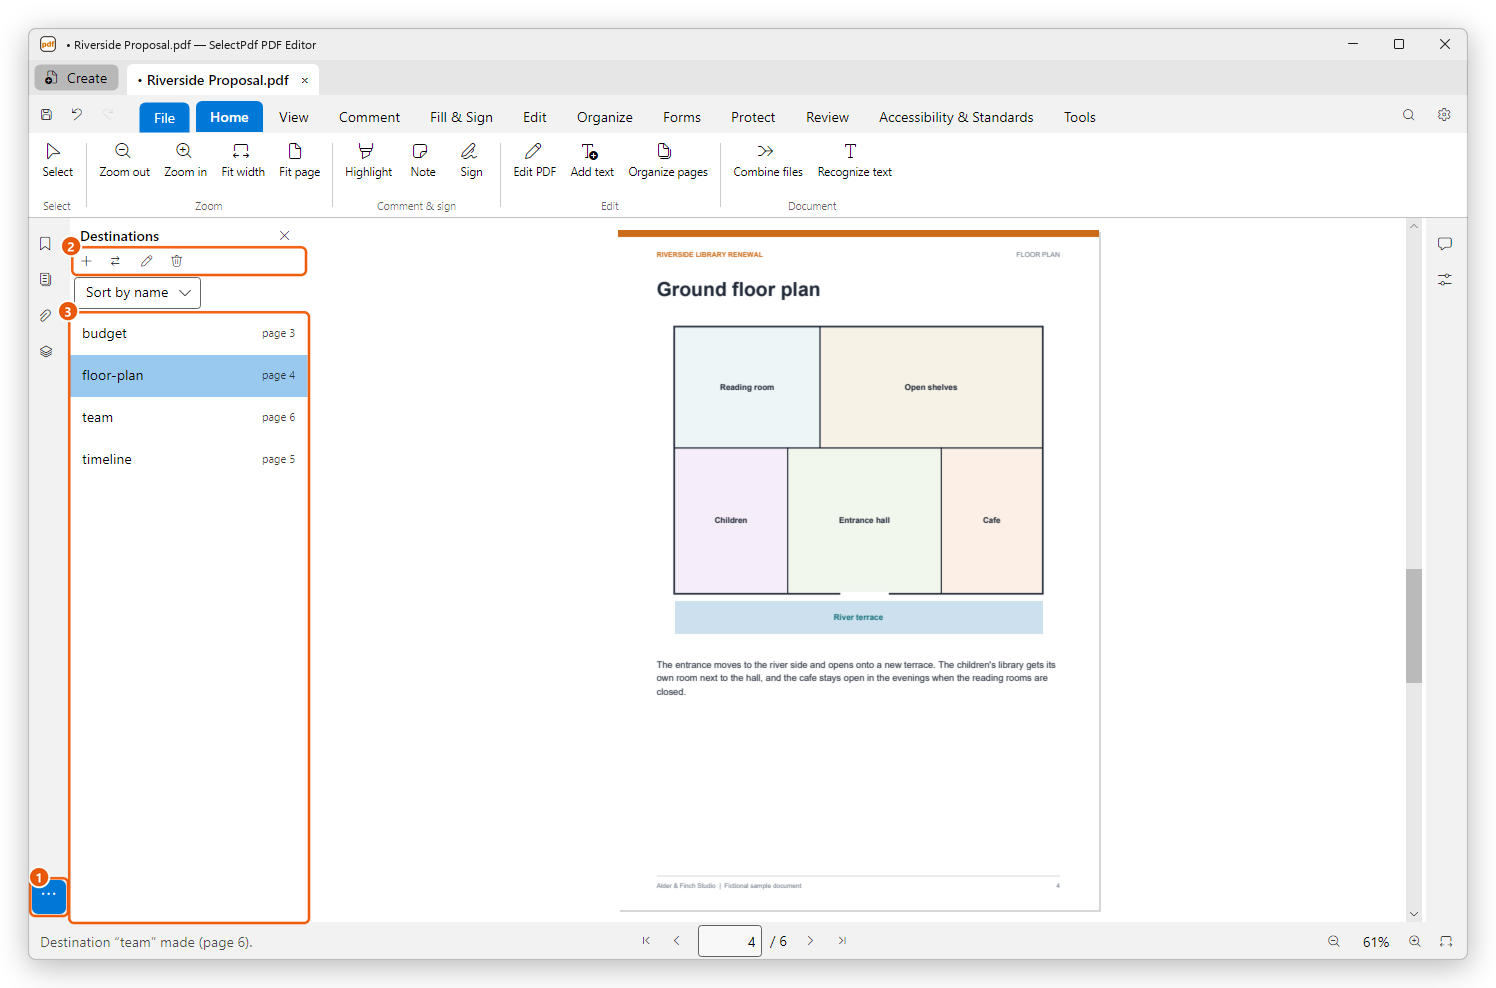
- More panels: click it, then Destinations.
- The buttons: New destination, Set destination to the current view, Rename destination and Delete destination.
- The destinations, with the page each goes to. Click one to go there.
Choose Sort by name or Sort by page above the list to change its order.
Make a named destination
- Go to the place: the page, with the part you want at the top of the window.
- In the Destinations panel, click New destination (the plus).
- Type a name and click OK. Each name can be used once in a document.
The destination keeps the page and the place at the top of the window; it opens at the reader's own zoom. To use it, add a link with the action Go to a named destination: see Links and actions.
Change a destination
Select it in the list, then:
- Set destination to the current view moves it to the place the window shows now.
- Rename destination gives it a new name. The links and bookmarks of the document that go to it are changed to the new name too.
- Delete destination removes it, after asking. The question says how many links and bookmarks go to it: they will go nowhere afterwards.
Articles
An article is a chain of boxes on the pages, in reading order. Readers follow it with Previous box and Next box, from column to column and page to page, without hunting for where the text goes on.
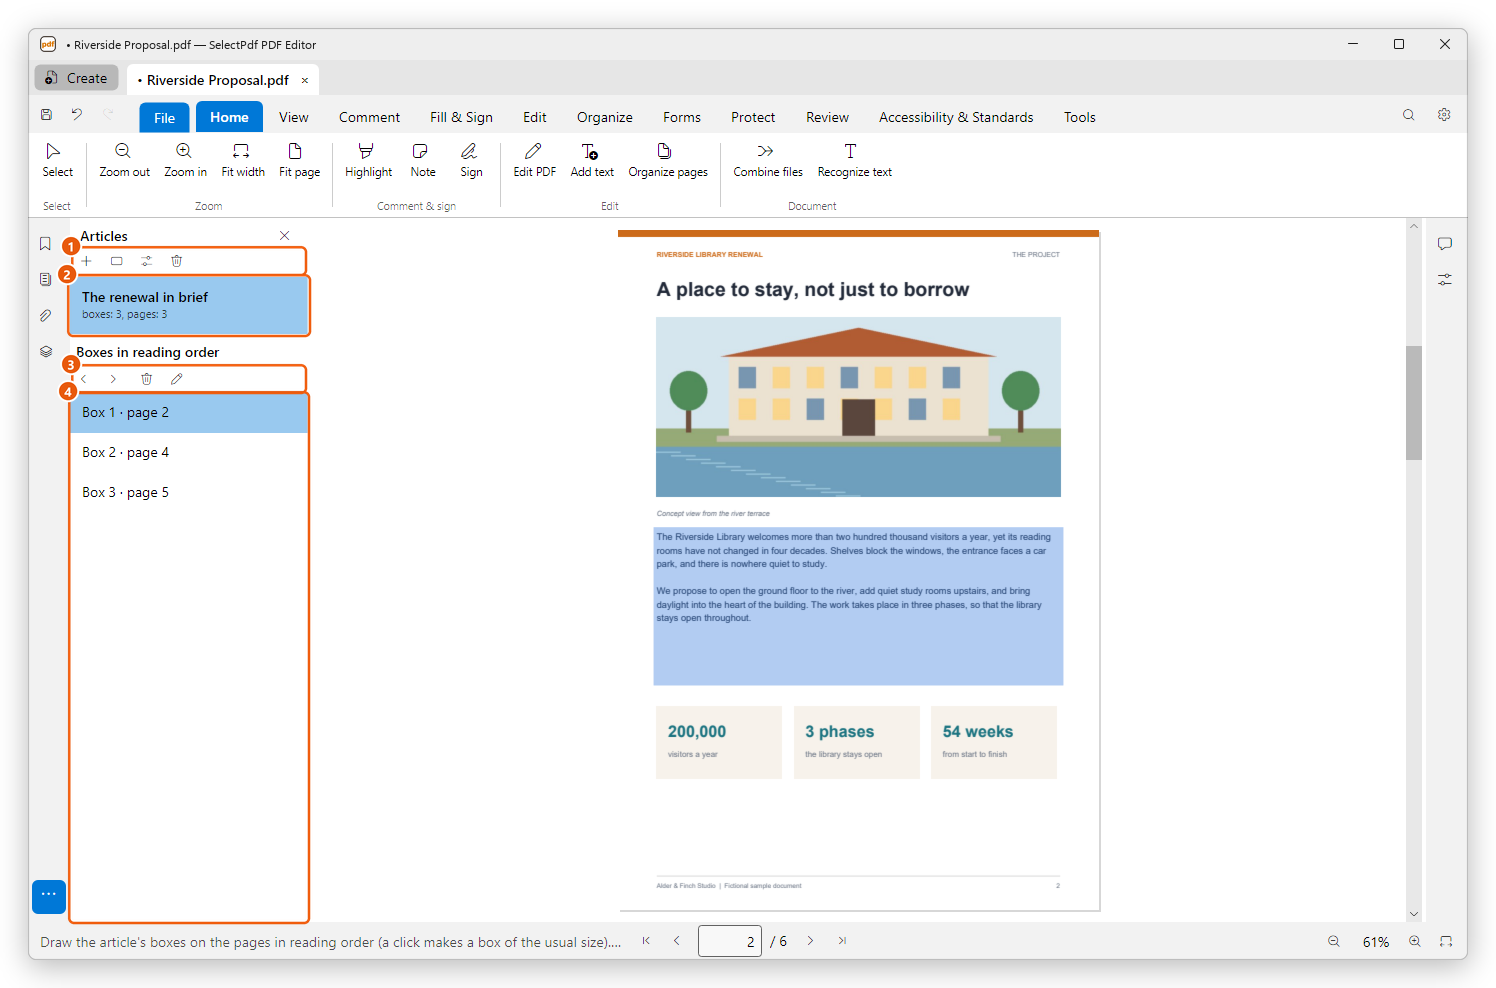
- The buttons: New article, Add boxes to this article, Article properties and Delete article.
- The document's articles, with how many boxes and pages each has. Click one: its boxes are marked on the pages, and the view goes to its first box.
- Previous box, Next box, Delete box, and Move or resize the boxes on the page.
- The boxes of the article selected, in reading order. Click one to show it.
Next box after the last box goes back to the first. The boxes are marked on the pages only while the Articles panel is open.
Make an article
Click More panels, then Articles.
Click New article (the plus).
Give the article its Title, and if you like its Subject, Author and Keywords, then click OK.
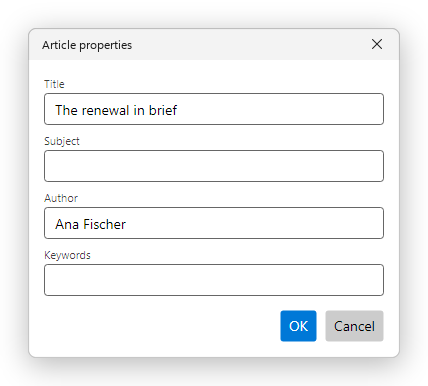
An article's properties Draw the article's boxes on the pages in reading order: drag a box over each part of the text. A click without dragging makes a box of the usual size.
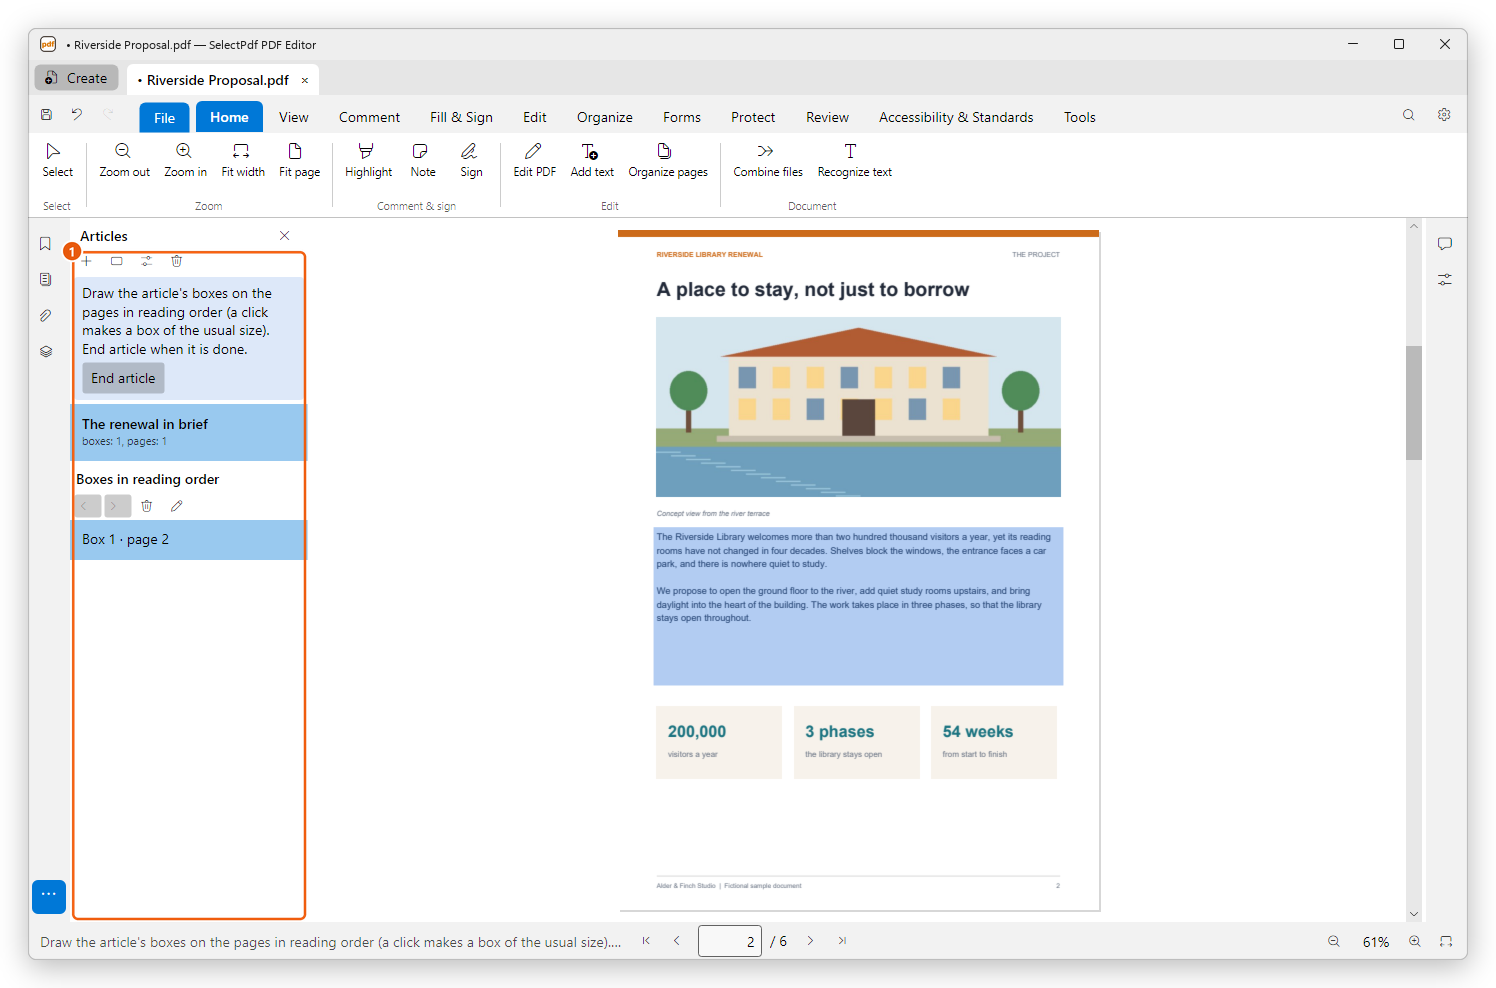
Drawing an article: its first box Click End article in the panel when the last box is drawn.
Choosing another tool ends the article too. To add more boxes later, select the article and click Add boxes to this article: the new boxes come after its last one.
Change an article
- Move or resize its boxes: select the article, click Move or resize the boxes on the page, then drag a box to move it, or a corner to resize it. Each box shows its number, for example 1-2 for the article's second box. Press Esc when you are done.
- Delete a box: select it in the list of boxes and click Delete box. Deleting an article's only box deletes the article.
- Change its title, subject, author or keywords: click Article properties.
- Delete the article: click Delete article. Its boxes go with it; the text of the pages stays as it is.
Going to named destinations and following articles are free. Making, changing and deleting destinations and articles need Pro.
Every change can be undone with Undo (Ctrl+Z). Save the document (Ctrl+S) to keep them.