Crop pages, page boxes and page labels
Crop the pages of a PDF, set their crop, trim, bleed and art boxes or change their size, number them with page labels such as i, ii, iii, and replace pages with pages of another file.
This page covers the page tools of the Organize tab that change how pages are set up rather than their order: cropping, the page boxes, the page labels, and replacing pages. To rotate, delete, move, insert, extract and split pages, see Organize pages.

- Crop pages: draw the part of the page to keep.
- Page Boxes…: type the margins of the page boxes, or change the page size.
- Remove crop: show the selected pages whole again.
- Page Labels: number the selected pages your own way.
- Replace…: put the pages of another file in place of the selected pages.
These tools are free. Each change is one step that Undo (Ctrl+Z) takes back; save the document to keep it.
Crop pages
- On the Organize tab, select the page and click Crop pages. The document opens at that page.
- Drag a box over the part of the page to keep.
- The Set Page Boxes dialog opens with your box as the margins of the Crop Box. Change them if you like (see below).
- Under Page Range, choose which pages to crop: All, or From one page to another; and under Apply to:, Even and Odd Pages, Even Pages Only or Odd Pages Only.
- Click OK.
Cropping hides what is outside the box; it does not remove it. Remove crop shows the selected pages whole again. To remove the hidden part from the file for good, use Remove hidden information (Content outside the pages (cropped)).
Set the page boxes
A page has up to five boxes, rectangles that tell apps which part of the page to use:
| Box | What it is |
|---|---|
| Media box | The whole sheet: the page's full size. |
| Crop Box | The part of the page shown on screen and printed. |
| Trim Box | The size of the finished page after it is cut, for printing. |
| Bleed Box | The trim box with the margin of colour that runs past the cut, for printing. |
| Art Box | The meaningful content of the page, for placing it in another document. |
Most documents only need the crop box; the trim and bleed boxes matter when you send a document to a printer, for example for PDF/X.
- On the Organize tab, select the pages and click Page Boxes…. Without a selection, the dialog sets all the pages.
- Under Margin Controls, choose the box: Crop Box, Art Box, Trim Box or Bleed Box.
- Choose the Units: (pt, in, mm or cm), and type the Top:, Bottom:, Left: and Right: margins, measured from the edges of the sheet. Tick Constrain proportions to give all four sides the same margin.
- Choose the pages under Page Range, and click OK.
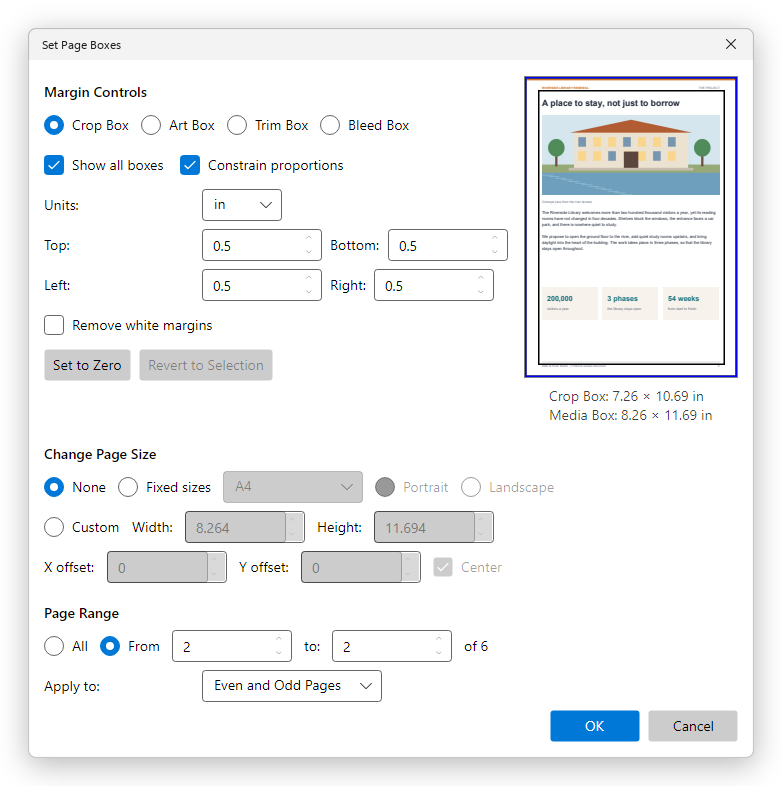
The preview on the right shows the page whole, with the box you are setting. Tick Show all boxes to see all of them, each in its colour: the crop box in black, the art box in red, the trim box in green and the bleed box in blue. Below the preview, the dialog gives the size of the chosen box and of the sheet.
- Remove white margins sets the crop box to the content of the page, without its empty margins.
- Set to Zero puts the box back on the edges of the sheet.
- Revert to Selection puts back the box you drew with Crop pages.
Only the boxes you change are set. The editor remembers the unit you chose.
Change the page size
Under Change Page Size, choose Fixed sizes and a paper size (Letter, Legal, Tabloid, Executive, A3, A4, A5, B4 or B5) in Portrait or Landscape; or Custom and type the Width: and Height:. The content is placed in the Center of the new page; untick Center to place it with the X offset: and Y offset: instead. None leaves the size as it is.
Page labels
The pages of a PDF are numbered 1, 2, 3... But a book may number its front matter i, ii, iii and its chapters from 1, and a report may have appendix pages A-1, A-2. Page labels give the pages these numbers, so that the page box at the bottom of the window shows them, and you can go to a page by its label.
- On the Organize tab, select the pages and click Page Labels. Without a selection, the dialog numbers all the pages.
- Under Pages, check the range: From: and to:.
- Choose Begin new section, then the numbering Style: (1, 2, 3; I, II, III; i, ii, iii; A, B, C; a, b, c; or None (the prefix only)), a Prefix: if you want one, such as A-, and the Start: number. The sample below shows what the first page will be called.
- Click OK.
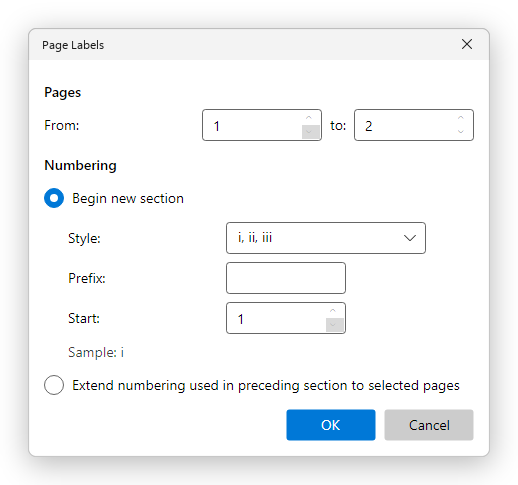
To number the next pages from 1 again, select them and run Page Labels once more with the style 1, 2, 3. To have selected pages go on with the numbering of the pages before them, choose Extend numbering used in preceding section to selected pages.
The page thumbnails on the Organize tab show the label too, with the page number in brackets when they differ, such as ii (2). The page box shows the label, with the page's place in the document:
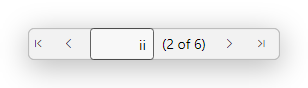
To go to a page by its label, type the label in the page box, such as iii or A-2, and press Enter. A label comes first: when the pages are labelled, typing 1 goes to the page labelled 1, not to the first page of the file.
A label with only a prefix names a single page, such as Cover. Page labels are not printed on the pages: to print numbers on them, add headers and footers.
Replace pages
Replacing puts the pages of another file in place of some pages of the document, for example a corrected page from a revised version. The links and bookmarks that lead to the replaced pages stay, and lead to the new pages.
- On the Organize tab, select the pages to replace and click Replace….
- Choose the file. It can be a PDF, or any file the editor converts to PDF (see Create a PDF).
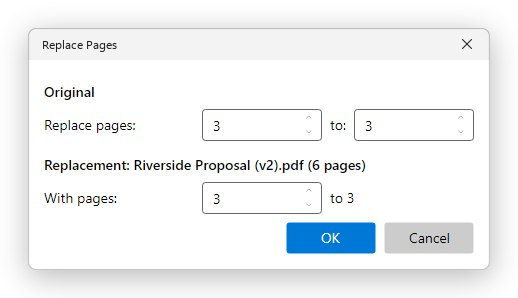
- In the Replace Pages dialog, check the pages to replace under Original: Replace pages: and to:.
- Under Replacement, type the first of the file's pages to use in With pages:. The dialog shows the last one, and says when the file does not have enough pages from there.
- Click OK.