Create a form
Turn a PDF into a form people can fill in: add text fields, check boxes, option buttons, lists, buttons, date, image and signature fields, then move, size, line up, copy and order them.
A PDF form has fields: boxes that people type in, tick or choose from. With Prepare form you add fields to any PDF, for example to a form that was printed to PDF with only lines to write on, and you change the fields a form already has.
Start Prepare form
- Open the document and click the Forms tab.
- Click Prepare form.
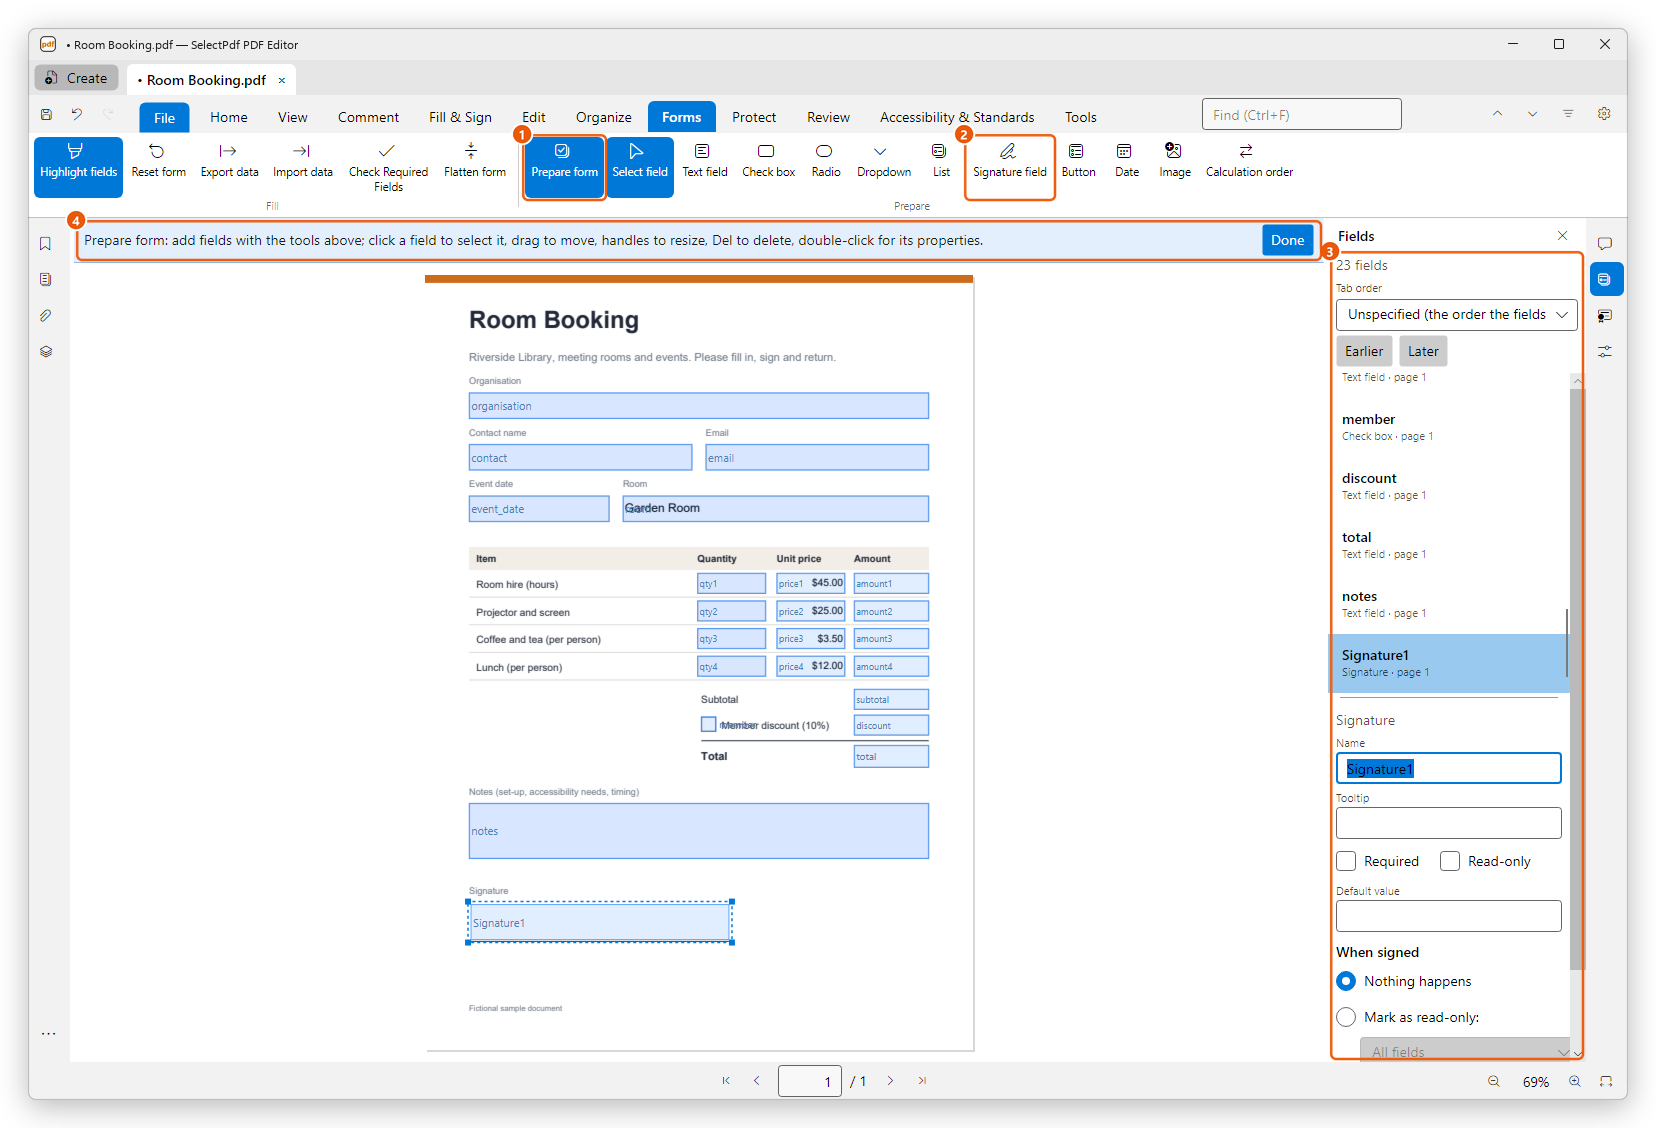
- Prepare form is on while you work on the fields.
- Signature field, one of the field tools: click a tool, then draw the field on the page.
- The Fields panel lists the document's fields and shows the settings of the one selected.
- The bar says what you can do. Click Done to go back to filling the form.
While Prepare form is on, each field shows its name on the page, and the fields cannot be filled in. Press Esc with no field selected, or click Done, to leave it.
Prepare form and every tool that adds or changes fields need Pro. Filling in forms is free: see Fill in a form.
Add a field
- Click the kind of field in the Prepare group (the list is below).
- Drag a box on the page where the field goes. A simple click makes a field of the usual size for its kind.
- The new field is selected and its name is ready to type in the Fields panel. Type a name that says what the field holds, for example email, and click Apply.
Each field needs a name of its own: scripts, calculations and exported form data refer to the field by its name. The editor proposes one (Text1, Check Box1, Signature1...), and you can change it at any time.
| Tool | What it adds |
|---|---|
| Text field | A box to type in: a name, an address, an amount. It can have one line or several. |
| Check box | A box to tick or leave empty. |
| Radio | A group of option buttons, of which one can be chosen. The group starts with two buttons. |
| Dropdown | A list that opens to choose one item. It can also let people type a value of their own. |
| List | A list that shows several items at once, for choosing one item or several. |
| Signature field | An empty place for a signature: a click on it lets the person sign with their handwriting or with a digital ID. |
| Button | A button that does something when clicked: reset the form, send it, open a page or a web address, run a script. |
| Date | A text field that takes a date (as mm/dd/yyyy), with a calendar to pick it. |
| Image | A box the person filling the form clicks to choose a picture (PNG, JPEG, TIFF, BMP, GIF or WebP), for example a photo for an ID card. |
What each field does is set in its properties: see Form field properties.
Option buttons (Radio)
A radio group is one field with several buttons: when one is chosen, the others are cleared.
- Select the group, and in the Fields panel click Add button for each more choice. A button is added next to the last one: drag it where it goes.
- Under Buttons, type what each button stands for, for example Invoice and Card. This is the value the form keeps when that button is chosen.
- Choose under Default value the button chosen in an empty form, or (None).
- Click Apply.
To delete one button, click the bin next to it under Buttons. Deleting the last button deletes the group.
Items of a dropdown or list
Type the items under Options, one per line (value|label when they differ), one per line, and click Apply. When the value the form keeps must differ from what people see, write both with a bar between them: GR|Garden Room shows Garden Room and keeps GR.
Select, move and resize fields
Click Select field (it is on after you add a field), then:
- Select a field: click it. Click a field in the Fields panel's list to find it on the page.
- Select several: Shift+click or Ctrl+click each one. They must be on the same page.
- Move: drag the field. Several selected fields move together. The arrow keys move the selected field by one point, Shift+arrow by ten.
- Resize: drag one of its corner handles.
- Delete: press Delete.
- See its properties: double-click it, or press Enter, or right-click it and choose Properties. Its properties dialog opens: see Form field properties. The Fields panel shows the main ones too.
With Snap to grid on (the View tab), fields you draw, move or resize line up on the grid: see Grid, guides and rulers.
A field marked Locked in its properties cannot be moved, resized or deleted until you clear that box. Undo (Ctrl+Z) takes back any change to the fields.
Line up fields
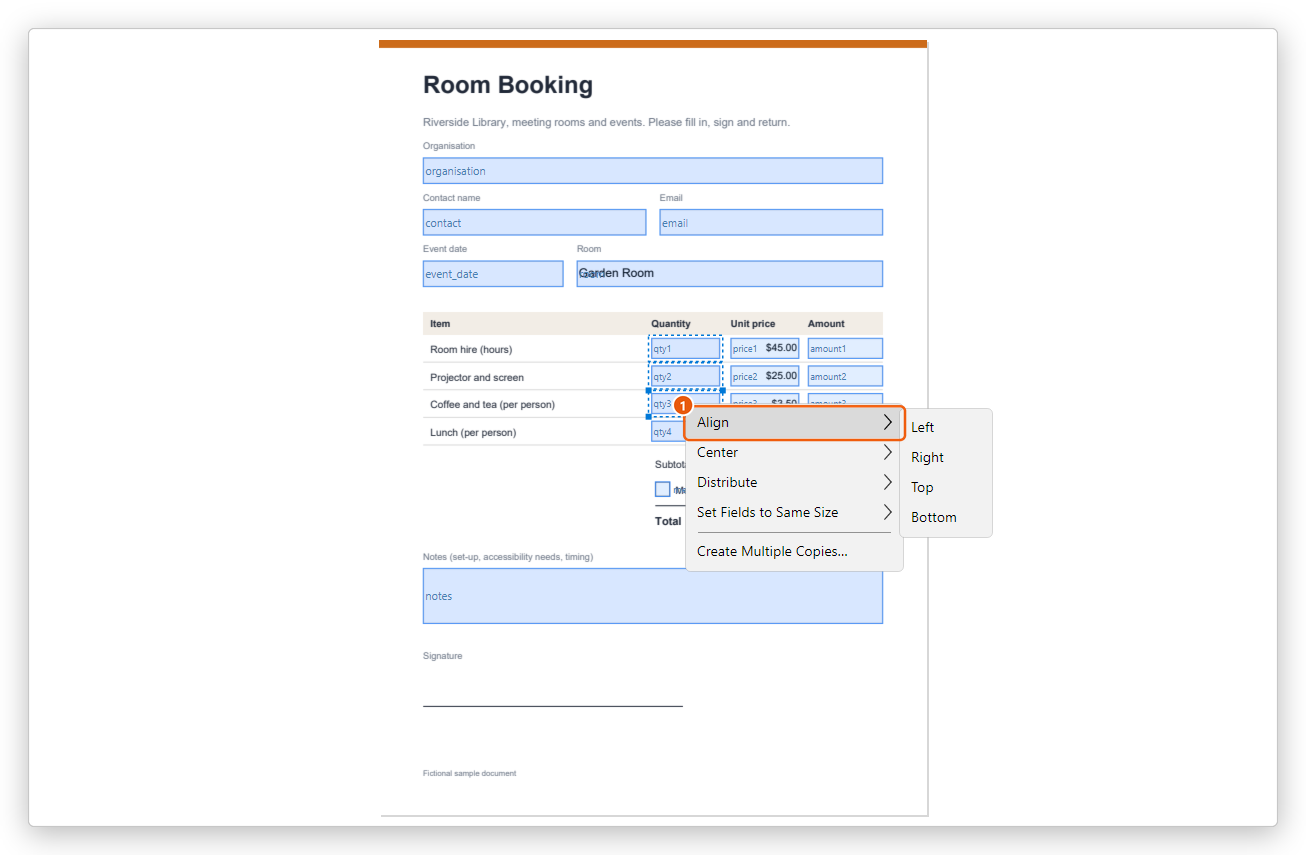
- Select the fields: click the one the others line up with last.
- Right-click one of them and choose:
- Align: Left, Right, Top or Bottom, to the edge of the field selected last.
- Center: Horizontally or Vertically, on the middle of the field selected last.
- Distribute: Horizontally or Vertically, to spread three fields or more evenly between the two outermost ones.
- Set Fields to Same Size: Width, Height or Both, the size of the field selected last.
Copy fields
Right-click a field for these commands:
- Duplicate... places the field on other pages, at the same place: choose All pages or type the Pages. It stays one field, so every page shows the same value, as a name repeated at the top of each page. It needs a document of more than one page, and is not for radio groups.
- Create Multiple Copies... makes rows and columns of copies, for example the lines of an order. Each copy is a field of its own.
- Add Label writes, on the page next to a check box or option button, what it stands for: the button's value, or the check box's name.
To make copies of several fields at once, as a whole line of an order, select them all and right-click one of them.
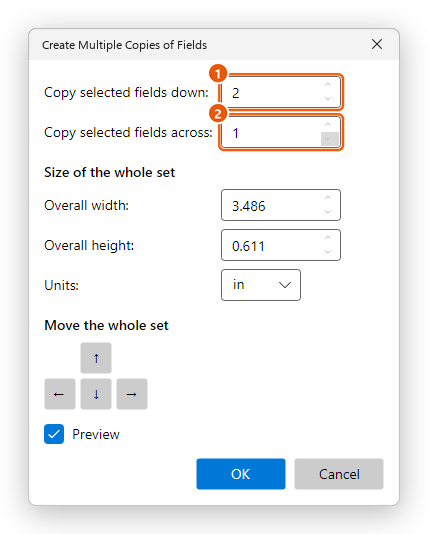
- Copy selected fields down: how many rows, the fields themselves being the first.
- Copy selected fields across: how many columns.
Overall width and Overall height set how far the copies spread (in the unit chosen next to them), and Move up, Move down, Move left and Move right move the whole set. With Preview ticked, the page shows where the copies will go while you set them. The fields and their copies are numbered as Acrobat numbers them: qty4.0, qty4.1... for a single row or column, qty4.0.0, qty4.0.1, qty4.1.0... (row, then column) for a grid. The copies have the field's properties, scripts and look, but not its value.
The Fields panel
The Fields panel opens with Prepare form. It lists every field with its kind, its page, whether it is required and its value.
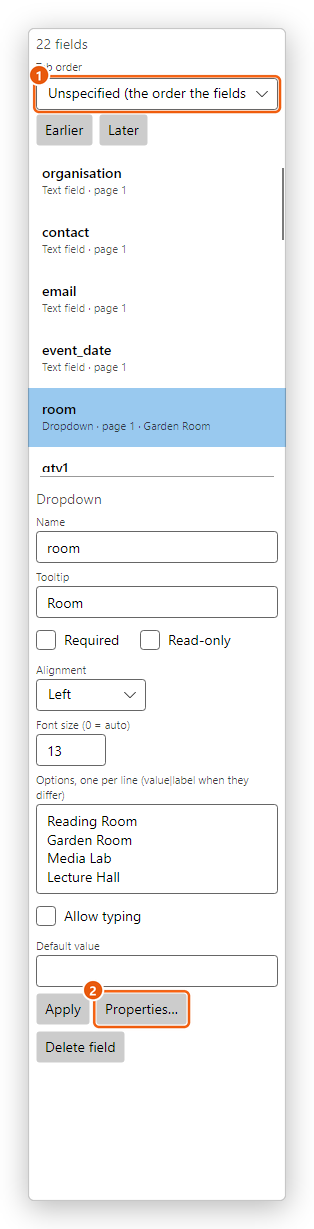
- Tab order: the order in which Tab moves through the fields.
- Properties... opens all the field's properties.
Below the list are the most used settings of the selected field: its Name, Tooltip, Required and Read-only, and the settings of its kind. Change them and click Apply: all the changes are one step to undo. Delete field deletes the field. See Form field properties for each setting.
Set the tab order
People filling the form press Tab to go to the next field. Choose the order under Tab order at the top of the Fields panel:
- Unspecified (the order the fields were made in).
- By row: across the page, then down.
- By column: down the page, then across.
- By structure (tags): the order of the document's tags, as screen readers read it (see Tags and reading order).
- Manual: select a field and click Earlier or Later to move it in the order.
The order is set for every page of the document.
Finish
Click Done to go back to filling, and try the form: type in the fields and press Tab to check the order. Then save the document (Ctrl+S).
To add totals and other values that the form works out by itself, see Calculate, format and check values. To make a field run a script, see JavaScript.